![]() |
| Add caption |
Showing posts with label Sculpture. Show all posts
Thursday, April 4, 2019
Sculptured Donuts
One of the presentations in the Art of Education Winter Conference was sculpture donuts presented by Sarah Engel. I immediately knew this was a definitely project to include in my Art club plans this winter. Sarah suggested referencing Andy Warhol and Pop Art as a historical connection but it really spoke Wayne Thiebault to me. So that is the approach I used. This took two 45 minute sessions. Week one they formed the donuts out of newspaper and covered them with Rigid Wrap. Students created 2 or 3 donuts. Week two they were painted with a light brown paint, iced with the glue and shaving cream mixture and covered with art foam sprinkles. To finish them off, after they had set up a little, we placed each donut on a doily and 6" plastic plate. The kids were so excited with anticipation of pranking their families into believing they were really donuts!
Saturday, December 9, 2017
Miss posted on wrong site...here it is now.
Back at it again!
| A Shapescapes Stabile |
| Another Shapescapes creation |
| More Shapescapes |
| Building stabiles with Legos |
| More Lego stabiles |
| Tossed out from a Math program Good for building in the Art Room! |
| A find in the bargain bin at Target One child's building ideas |
| Same material as about right but a different idea on how to build. |
Wednesday, December 28, 2016
Kindergarten snowmen 2016
| A crowd |
![]() |
| Student work |
![]() |
| Student work |
Saturday, April 9, 2016
Success with the Blick project from the AOE Conference
If you participated in the Winter AOE conference, you will recognize this great project. We received a materials sample in the SWAG box. I feel in love with it right away and knew it would be a way to use my stash of twistee wire and a new way to have students demonstrate movement in their art. The challenge was to create movement and the work had to balance. I have done a twistee wire project in the past but this one is a little simpler and a lot more interesting. I had the black ovals stashed away from a donation from another teacher, they worked great for the bases. As you can see, some students opted to decorate the bases as well as the cardboard pieces that make the bodies of their people. I know my 4th graders struggled with this in the beginning but in the end, they loved their creations and were so excited to take them home!
Sunday, January 10, 2016
MINIONS!!!
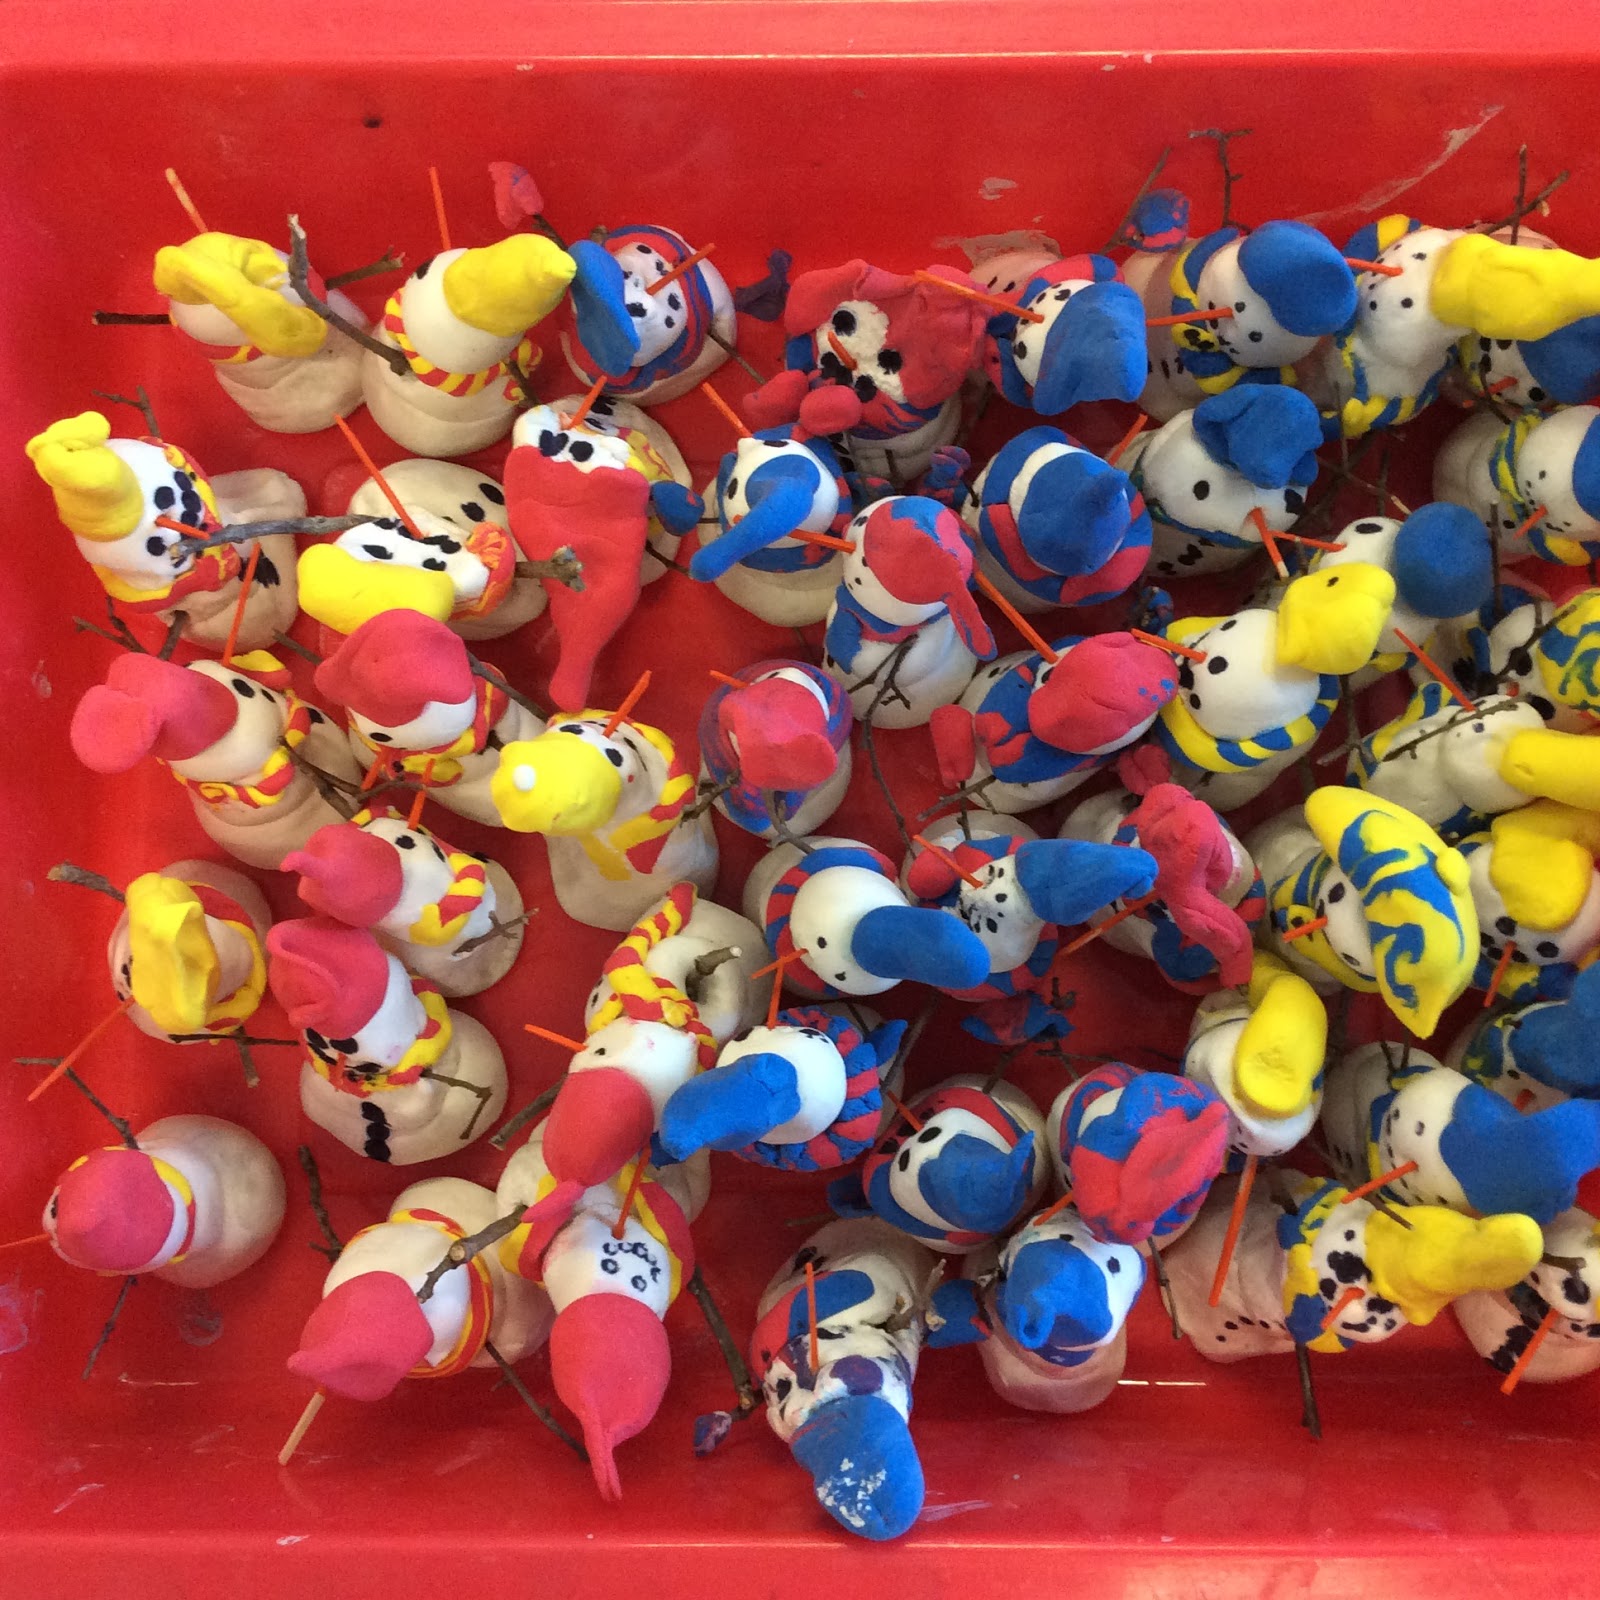
I am so enjoying the Art Club kids and our once a week meetings. Deciding to run an Art Club rather than an afterschool program has given me a bit more freedom in the projects we do as well as allowing more input from the group. Every few weeks we briefly discuss and plan what we would like to do next as a group. I throw out some ideas to kick start the discussion and students submit ideas as well. The first week we met, we started the club in that way and one of the first request I received was to create minions. I happened to be working with Model Magic in the younger grades so that medium came to
mind. I also had a bag of plastic easter eggs that I felt might use as a form and cut down on the amount of clay we would need to use. Each child was given a 5 oz bag of yellow to cover their egg to create the body of the minion. We used blue, grey and black for the other elements and students used a model of a toy Minion for inspiration along with their own experiences and observations. We used one bag of white (5oz), 6 (5oz) bags of blue and the large bags of both gray and black. A few smaller bags of black and gray would have been sufficient but I was unable to find the small bags locally. The eggs had been purchased at the end of the season a few years ago for 5 cents a bag. We took photos for Artsonia immediately and the students took these right home with instructions to allow them to dry before they handled them too much. The project took about 40n minutes and the kids were thrilled.
Oh, after I came up with the plan and purchased all the materials, I found a minion kit by Crayola at the local Michael's store. It was around $7.00 to make 2 small minions. All total, 14 students created minions for about double that cost.
Tuesday, September 29, 2015
Rethinking Kindergarten
I took an AOE class this past summer to re access my approach to teaching Kindergarten. I thought it would be chuck full of new project ideas and how to better meet the needs of my youngest students. I was think curriculum, skills and lesson plans. Well, I was a bit off track but not completely. The course, Rethinking Kindergarten, introduced me to the Reggio Emilio style of teaching. What it made me do was to take a step back and re evaluate everything I have been doing with my kinders. I spent the rest of the summer trying to put together some materials for students to freely create with that would take them away from the ordinary crayons and paper approach I had been using. I made a trip to the local dollar store where I picked up some pool noodles and bendable hair curlers which probably turned out to be my best investment. Other finds came from the dollar bins at Target and cast aways from class room teachers. I am in the process of putting together a DIY light box for next week using a plastic bin and Christmas lights. Scored those today at the local big box store because of course they already had Christmas shelves stocked before October 1st!!! My approach with the kids was to talk about cooperation and sharing and just being creative. Their focus was to build sculptures. We talked a bit about sculptures before I ever laid out the materials and then I allowed creativity to blossom. After two different classes, I have to say, this has been terrific!!! I love how they have really gotten into it and just enjoyed working together and letting their imaginations flow. Some even explained the purpose of their sculptures and named them. All the while, I have my iPad in hand and am recording for Artsonia as well as shooting pictures for this post. Reggio is all about documentation and the kids loved that I was valuing their work by taking photos of it all. So here are a few photos of the process.
| This student told me this was his car |
| students loved these twisty hair rollers |
| A tower on it's side |
| A flower |
| Yummy ice cream |
Wednesday, June 10, 2015
Let's Recycle!
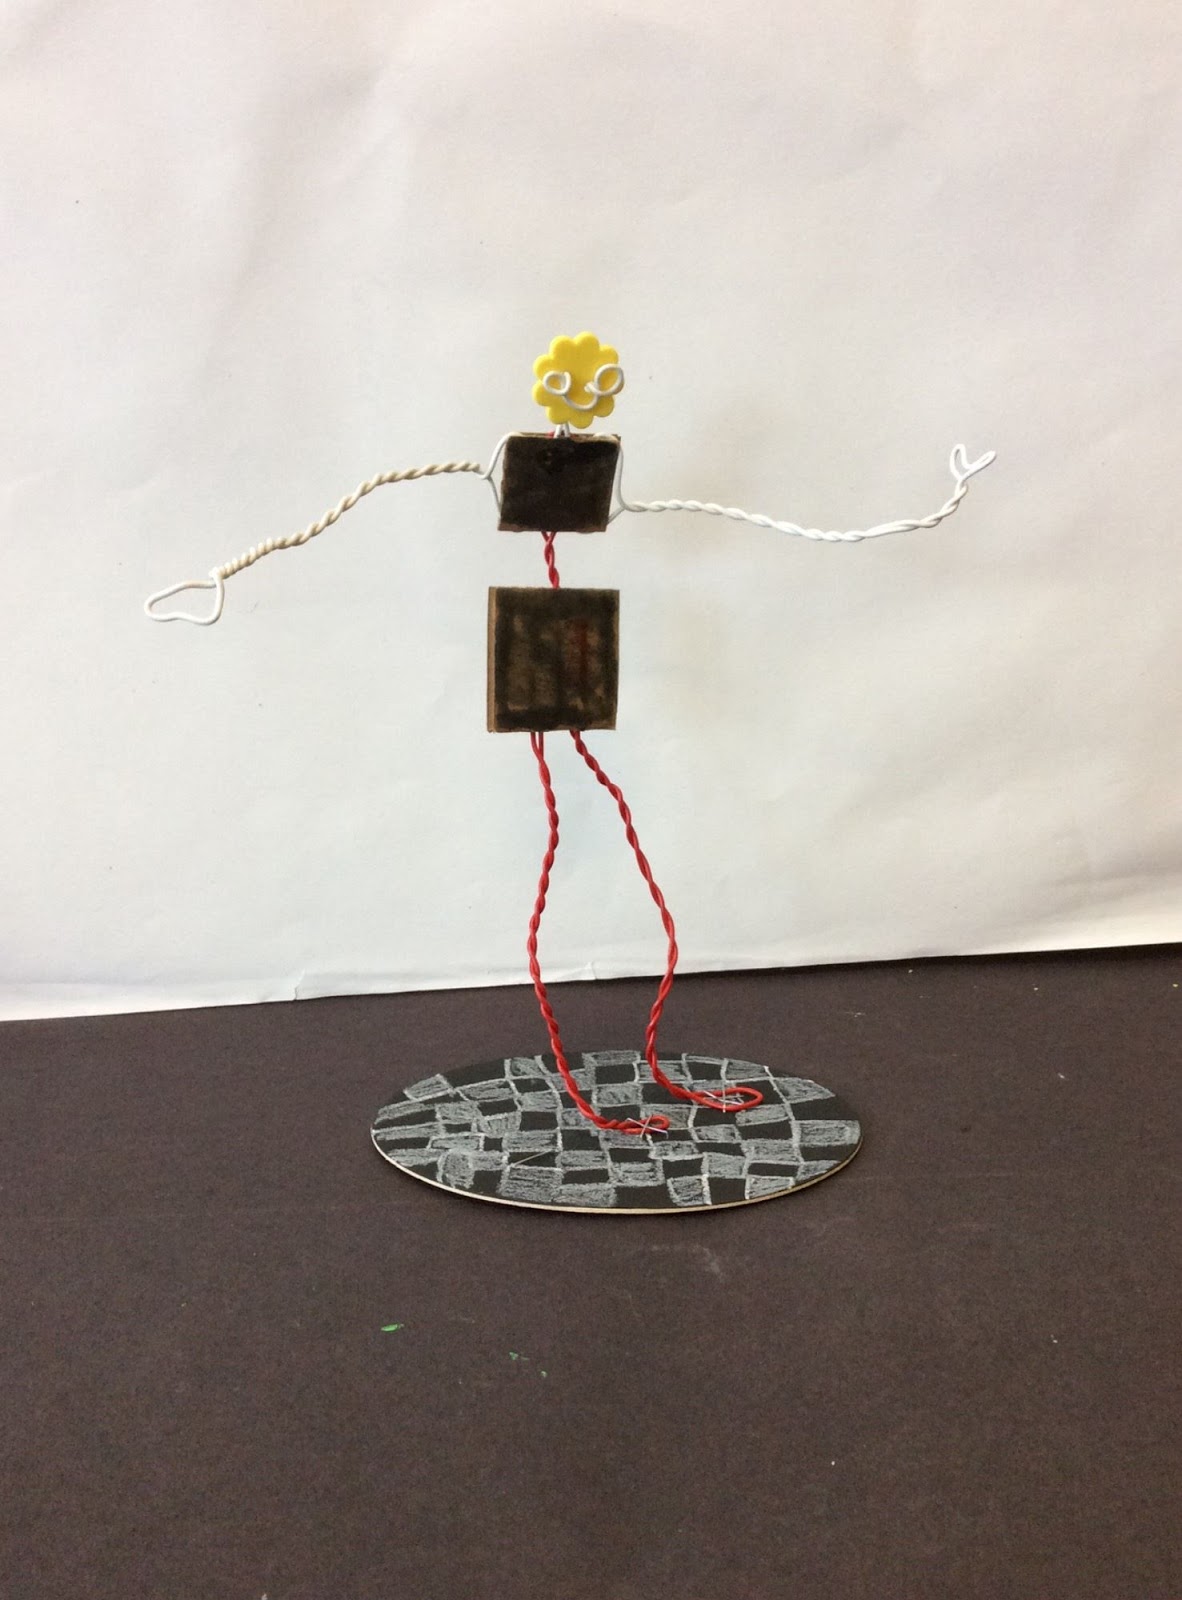
Here we are in the final weeks of school and I have so much cleaning out to do! My room became the catch all space for some really cool recyclables this year so when I was trying to come up with a final project for a class of second graders, recycled materials came to mind. I had a huge pile of thin cardboard that a stamp collector had passed on to me as well as some cool ovals cut from mat board. I pre-cut all the cardboard into 2" x 2" squares and gave students the option to use as many as they wanted but with a minimum requirement of five squares for each sculpture. First we reviewed how to slit the squares on each side so they could slide and lock together to form the structure. Students experimented with what they sculpture might look like and determined how many squares they would need. They also could cut anything into a small size if they wanted. As soon as they had a plan they disassembled everything and painted the pieces in colors of choice adding designs and patterns as they wanted. Once everything was dry, sculptures were reassembled and I used hot glue to attach them to the base. This was a very successful project, the students really enjoyed it and it was all recycled!!Saturday, March 7, 2015
A little sculpture for some reflection on Jim Dine
Second grade students explored the work of Jim Dine prior to making these little mini sculpture using colored Popsicle sticks to build the frames and model magic to create the hearts. Week one was building the frames and forming the heart. Both were left to dry for week two. Tempera paint was used to add personal details to the frame. The heart were then colored with water based markers. A little spritz of water created the tie-dyed effect for the hearts. Students attached the heart on the heart. One student even chose to place his heart upside down.
![]() |
| Exhibited this way as requested by student |
Monday, April 22, 2013
Subscribe to:
Comments (Atom)


