Showing posts with label crayons. Show all posts

Sunday, March 6, 2016

Neat Freak Treats


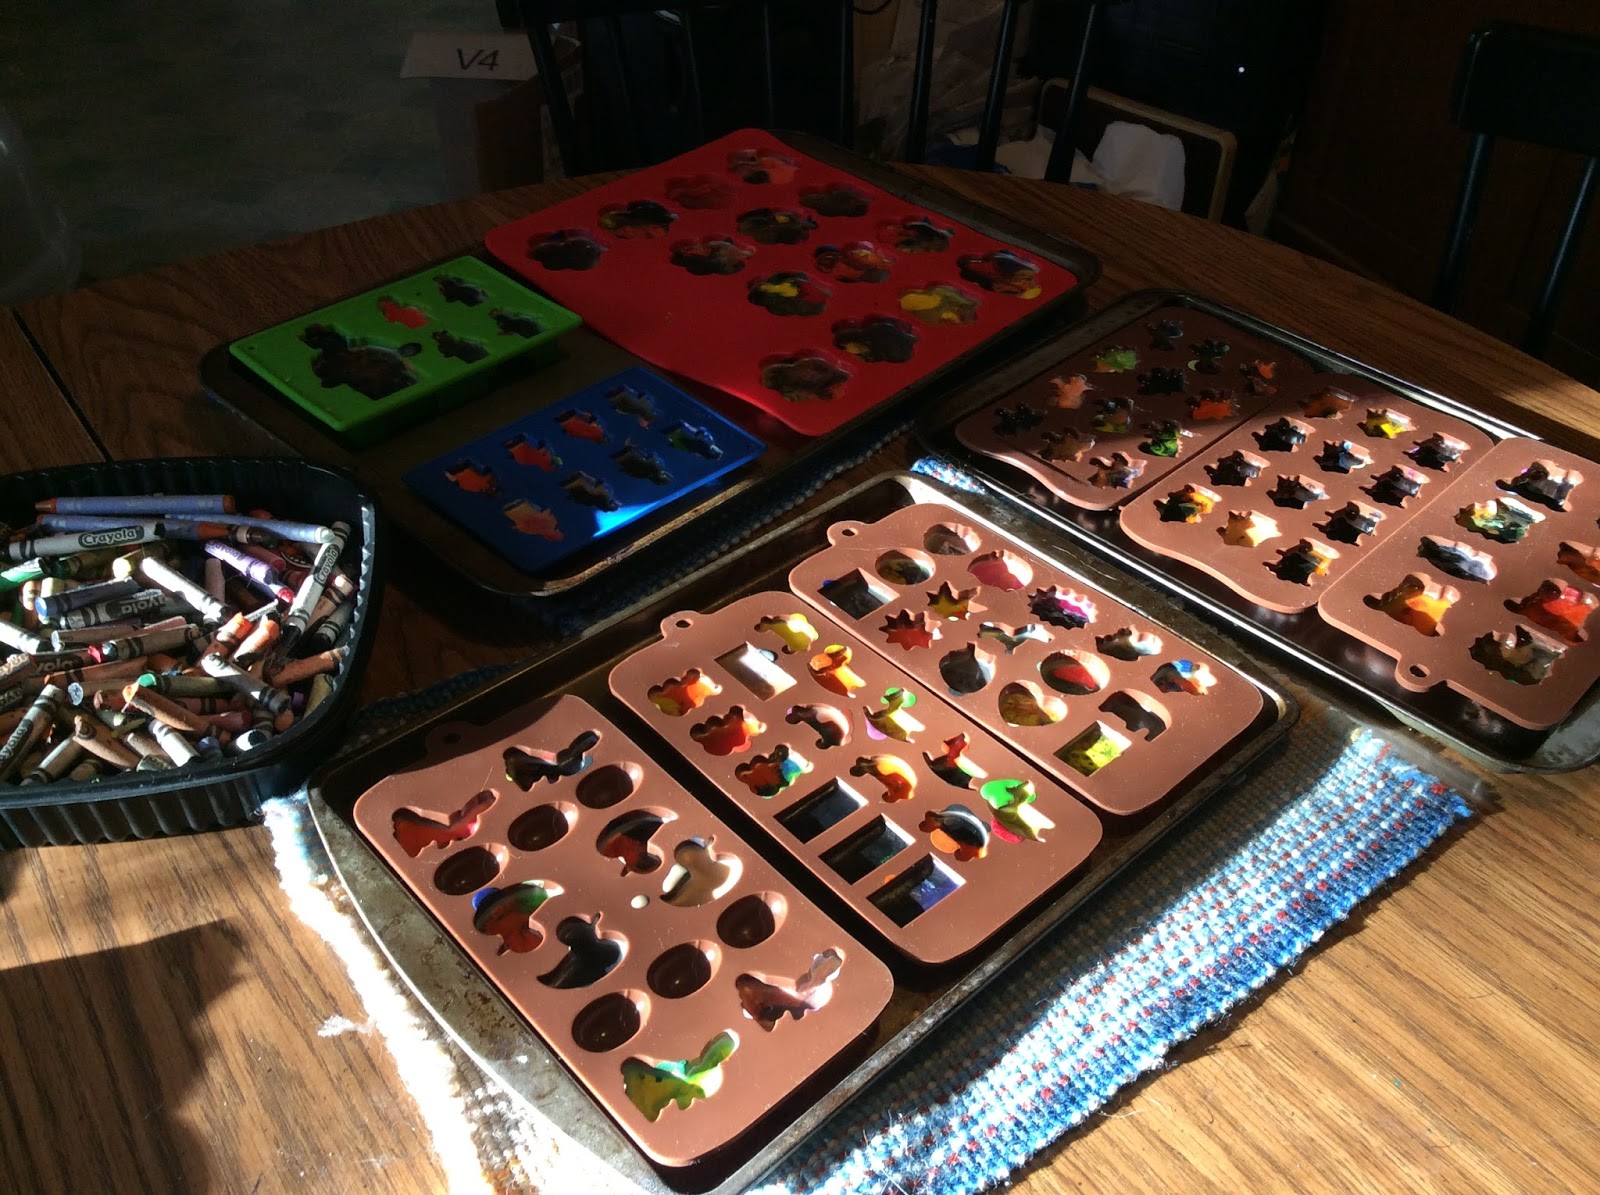
My thumbs are sore from peeling crayons but I have a lot to show for it and have re purposed a huge container of broken bits.   My students love re purposed crayons.  This all started in the fall as I revamped my classroom management.  I added a new job to my job chart called "neat freak".  The neat freaks job is to help clean up all the tools that were dropped on the floor or misplaced and not put back away correctly.  After everything has been cleaned up, I call the neat freaks, one from each table to locate a mystery item.  I used to write down what the item was on a post-it before they began but now I just keep it in my head.  For example, it might be the pencil that rolled under the table or a shelf,  scissors that were left piled down somewhere instead of returned to their place or even just a paper that was dropped on the floor and not picked up.  I think this is the highlight of each class because the winner receives a prize.  I began the process thinking I would pick  up pencils, cutesy erasers and such at the dollar store for the prizes but stumbled on the idea to re purpose crayons when I found a silicone baking sheet of pumpkins back in the fall.  They were an instant hit so now my only out of pocket cost is for the array of baking forms I have added to my collection.  Just google silicone baking sheets and you will see what I mean.  I will be able to reuse the baking sheets for years so my investment has dropped to zero.  Now I spend my evenings and weekends peeling broken crayons.    I will either develop the strongest thumb muscles know to mankind or be forever in pain!!!  It's the little things that make the difference in a classroom and either way the payoff is definitely worth it!

Saturday, June 13, 2015

Thanks to Mr. E! A Pout Pout Fish Lesson

Back in November, Mr. E over at Art with Mr. E ran a giveaway for copies for the Pout Pout Fish book series, and I won! I read the books and couldn't wait to figure out a way to use them.  Well, I finally came up with an idea a few weeks back and here are the wonderful results made by my kindergarten students.  They began the project by cutting shapes and assembling them into a fish.  Week two was about texture as students added scales and other details to the fish.  We also investigated the under sea habitat of a fish and used crayon to create the bottom of the sea.  Week three, students finished any coloring from the week before and added the sea to their work with liquid watercolor.  Once dry, shape fish were added to the composition.  So, here is to Mr. E.  We loved the books and with the three book series were able to enjoy a new one each week to accompany the steps of the project.  My personal favorite was the one about school but I think my kinders really enjoy hear about the Deep Deep Dark!
lots of coral and sea weed in this sea

This one imagined a clam with pearl and a star fish

I love the castles in these two girl's work (top and bottom) and the
unicorn fish.  You can tell they sit closely together.

Saturday, August 9, 2014

Crayola Ultra-Clean

I recently purchased a box of the new Crayola Ultra-clean Washable crayons and Washable Markers at the local big box store.  I immediately opened them both and tried them out for coverage and color value.  I was happy with the product.  I colored my skin and just like in the promotional advertisements, it washed right off.  I didn't want to try the wash ability on clothing; wasn't brave enough.  What if the advertisement was hyped a bit and I ruined my clothing.  Then it occurred to me to pull out my swag apron from the spring AOE conference.  I had used it for printing earlier in the week, note the post prior to this one.
coloring the bird with washable crayons

adding a zentangle and flower with the markers
After rinsing out the marker and crayons with running cold water

Conclusion:  They work great!!!

Monday, April 28, 2014

Non-glaze effects for clay

I was checking out the latest outfit Cassie Stephens was sporting on her blog the other day and found her post about clay hearts that had been colored with crayons and then painted with watercolors.  I was inspired by her results and it got me thinking.  My third grade students worked with clay with an emphasis on slab and texture this year.  There are lots of challenges with glazing and firing a kiln full of slabs and I really didn't feel I had enough stilts to make certain we wouldn't have a mishap or two.  I decided to set up stations and give the students choices on how they might complete their work.  Two stations contained tempera paint in neon colors.  By splitting it into two stations I had divided the painters into two separate groups so that they wouldn't be working elbow to elbow.  Another station contained crayons, one oil crayons, and one colored pencils.  The last three stations would all have an India ink wash applied to the final project.  As the students finished, I applied the ink and they removed it under running water with a gentle rub.  So here is the reason for this post,  the ink just didn't have the pizazz I was looking for.  Last year I had done clay magnets with kindergarten, here and had used black tempera paint.  I really liked the way they had turned out and how the color of the crayons seemed to pop.  Tempera is definitely my medium of choice with this technique.  Here are a few finished birds to demonstrate the differences.
Left: Oil Crayon with Tempera
Center: Crayon with India Ink
Right: Color Pencils with India Ink

I may try to paint over the ink ones and see if I can achieve more contrast with the colors...we'll see.

Monday, October 21, 2013

She was very busy spinning her web

 Kinders enjoyed a reading of Eric Carle's The Very Busy Spider this past week.  The repetition of this book makes for a fun reading as students soon catch on and recite along with the book.

With a focus on line and shape, students then created a web using a white crayon.  Vocabulary included horizontal, vertical, diagonal, and angle.  A black crayon was used to create the spider with circles that are colored in slowly around the edges to become dots.  The magic of the lesson occurs as a liquid watercolor wash is applied over the compositions.  The students were delighted with their busy spider creations.


The Very Busy Spider

Monday, July 22, 2013

Have you found these, yet?

I found these today at my local discount store and immediately bought a box of each.  My only disappointment was not finding a box of the orange hues.  I will definitely use these as teaching tools when working with values and tints or color families and warm and cool colors.  Love them!   Anybody else have any ideas for the new, nouveau, crayons?

Friday, June 7, 2013

Sometimes it just doesn't work....

Every year I look at the broken crayons that have accumulated in my crayon baskets and feel a bit of guilt and I collect them and toss them into the trash.  After seeing a few pins on pinterest about recycling crayons, I felt it was time to give it a try. I was especially drawn to a pin where a solar oven had been used to melt the crayons down and felt this was the best approach to take.  I have a couple of metal carry out containers that I thought would be perfect to create a solar oven and picked up a couple of muffin tins to use for the shape.  I wanted a clever shape but couldn't locate one so settled for basic round openings.


First I had soaked the crayons in cold water to release the paper wrappers.  This works pretty well but is not 100%.  Thankfully, I had a few 5th grade students who had finished their projects and were looking for some busy work.  They eagerly took care of removing the papers from the crayons and actually saved the good papers for a collage project they have in mind for this summer.

With all the compartments in the muffin tin filled, I found a sunny location outside of the classroom on a humid 90 degree day, put the lid on my makeshift oven and hoped to melt lots of crayons.

Well,  6 hours later, the crayons had only softened.  I uncovered the oven and exposed the crayons to direct sunlight for another hour.  There was a little progress but not enough to qualify the process for use in a 45 minute class period.  I pulled out my toaster oven and in minutes had achieve the goal of melted crayons.  They cooled relatively quickly and popped right out of the tins.

Admittedly, I was disappointed.  I had great expectations for a wonderful class with kindergarten where we could witness some science in action and walk away with a re purposed crayon to take home.  I do highly recommend attempting this in the core classroom where more time can be devoted to the process but just don't see how I can really make it work in the Art Room.