Showing posts with label Primary Colors. Show all posts

Monday, November 14, 2016

3D Color Mixing Pumpkins


Color Mixing Pumpkins


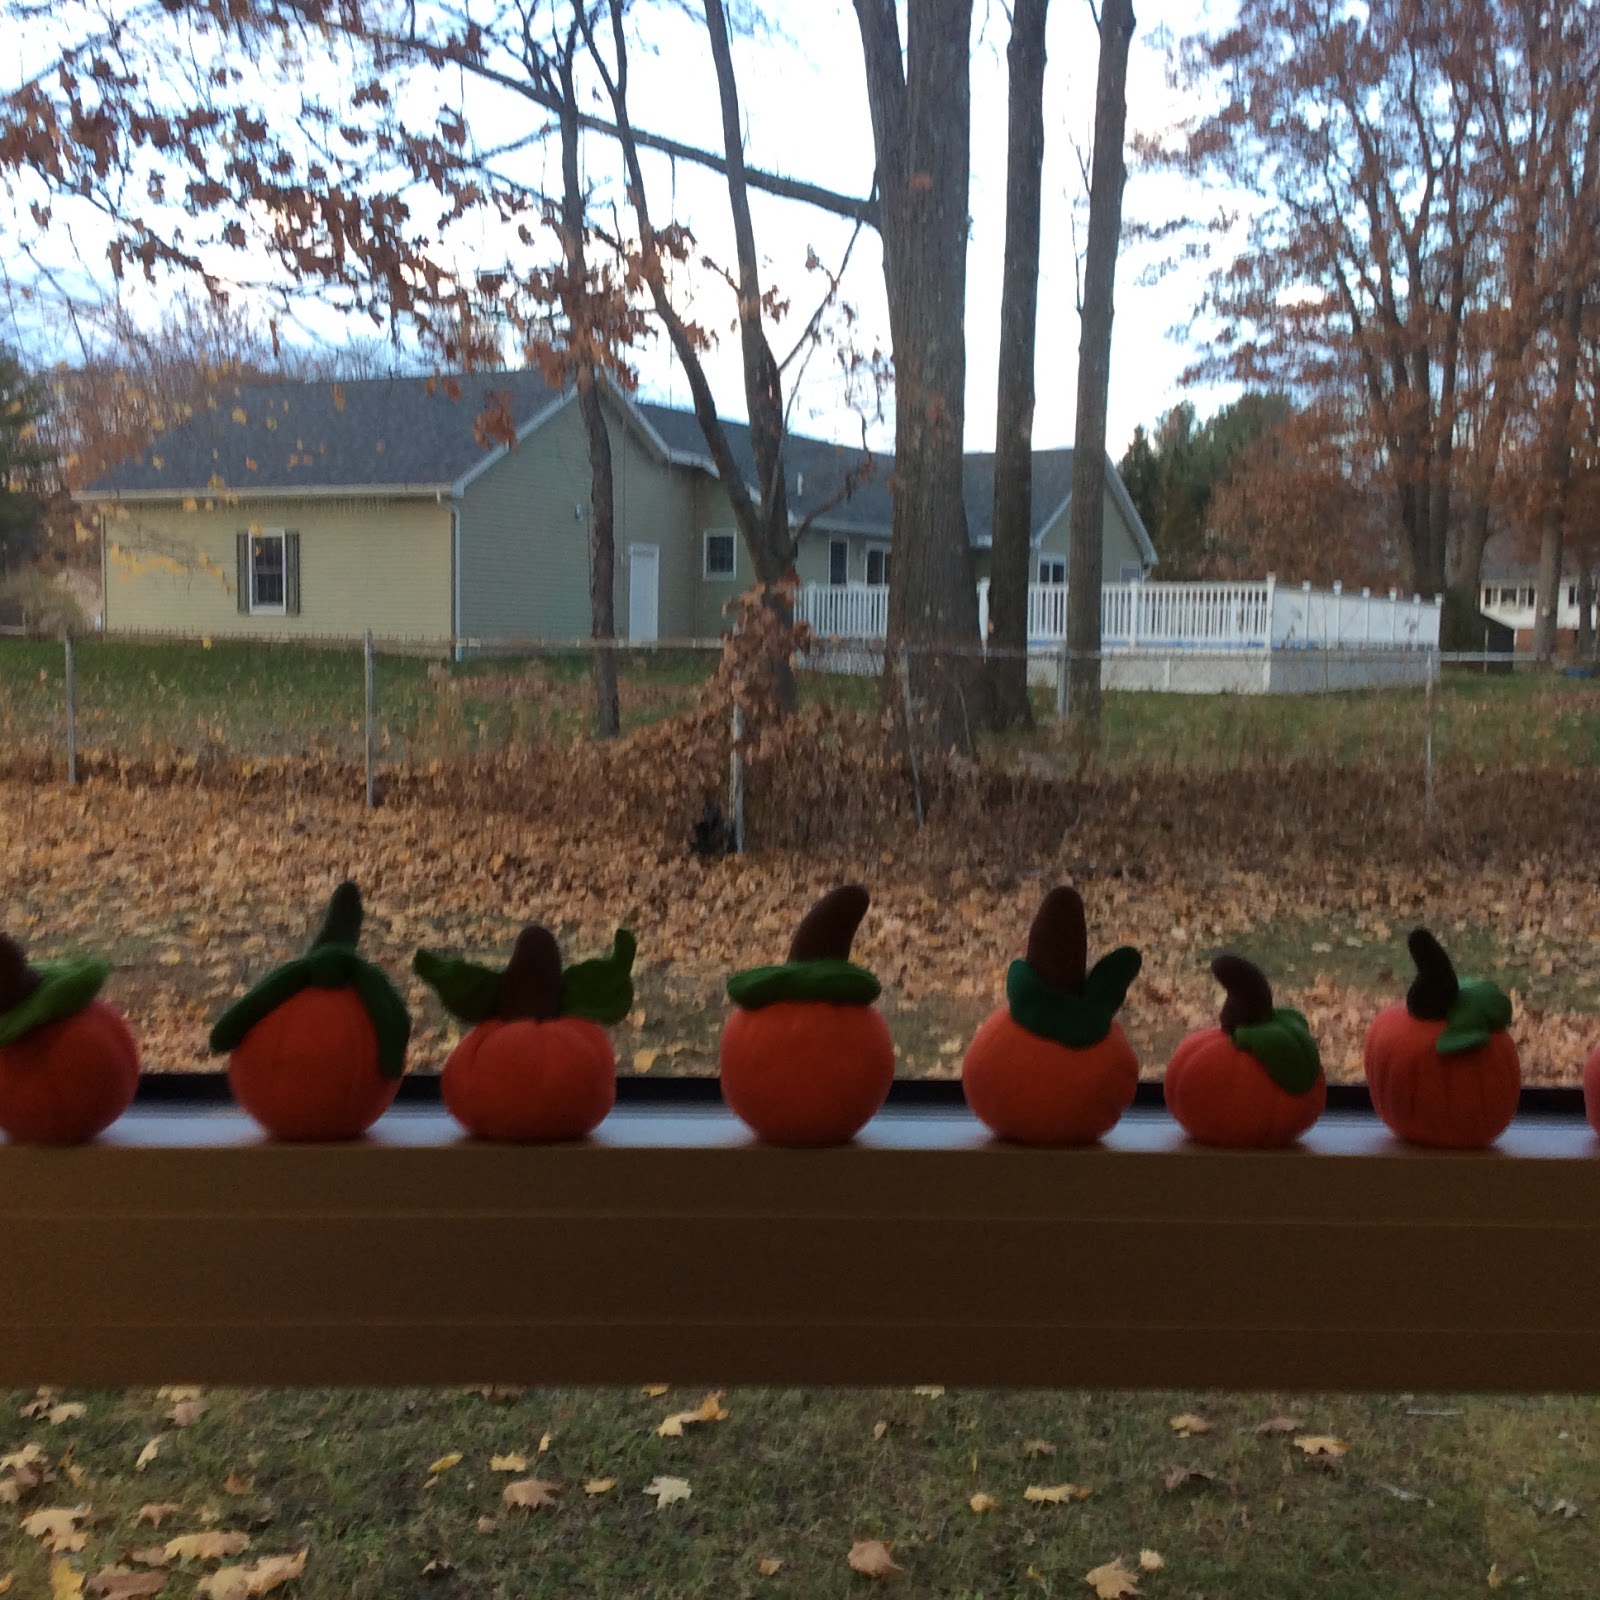
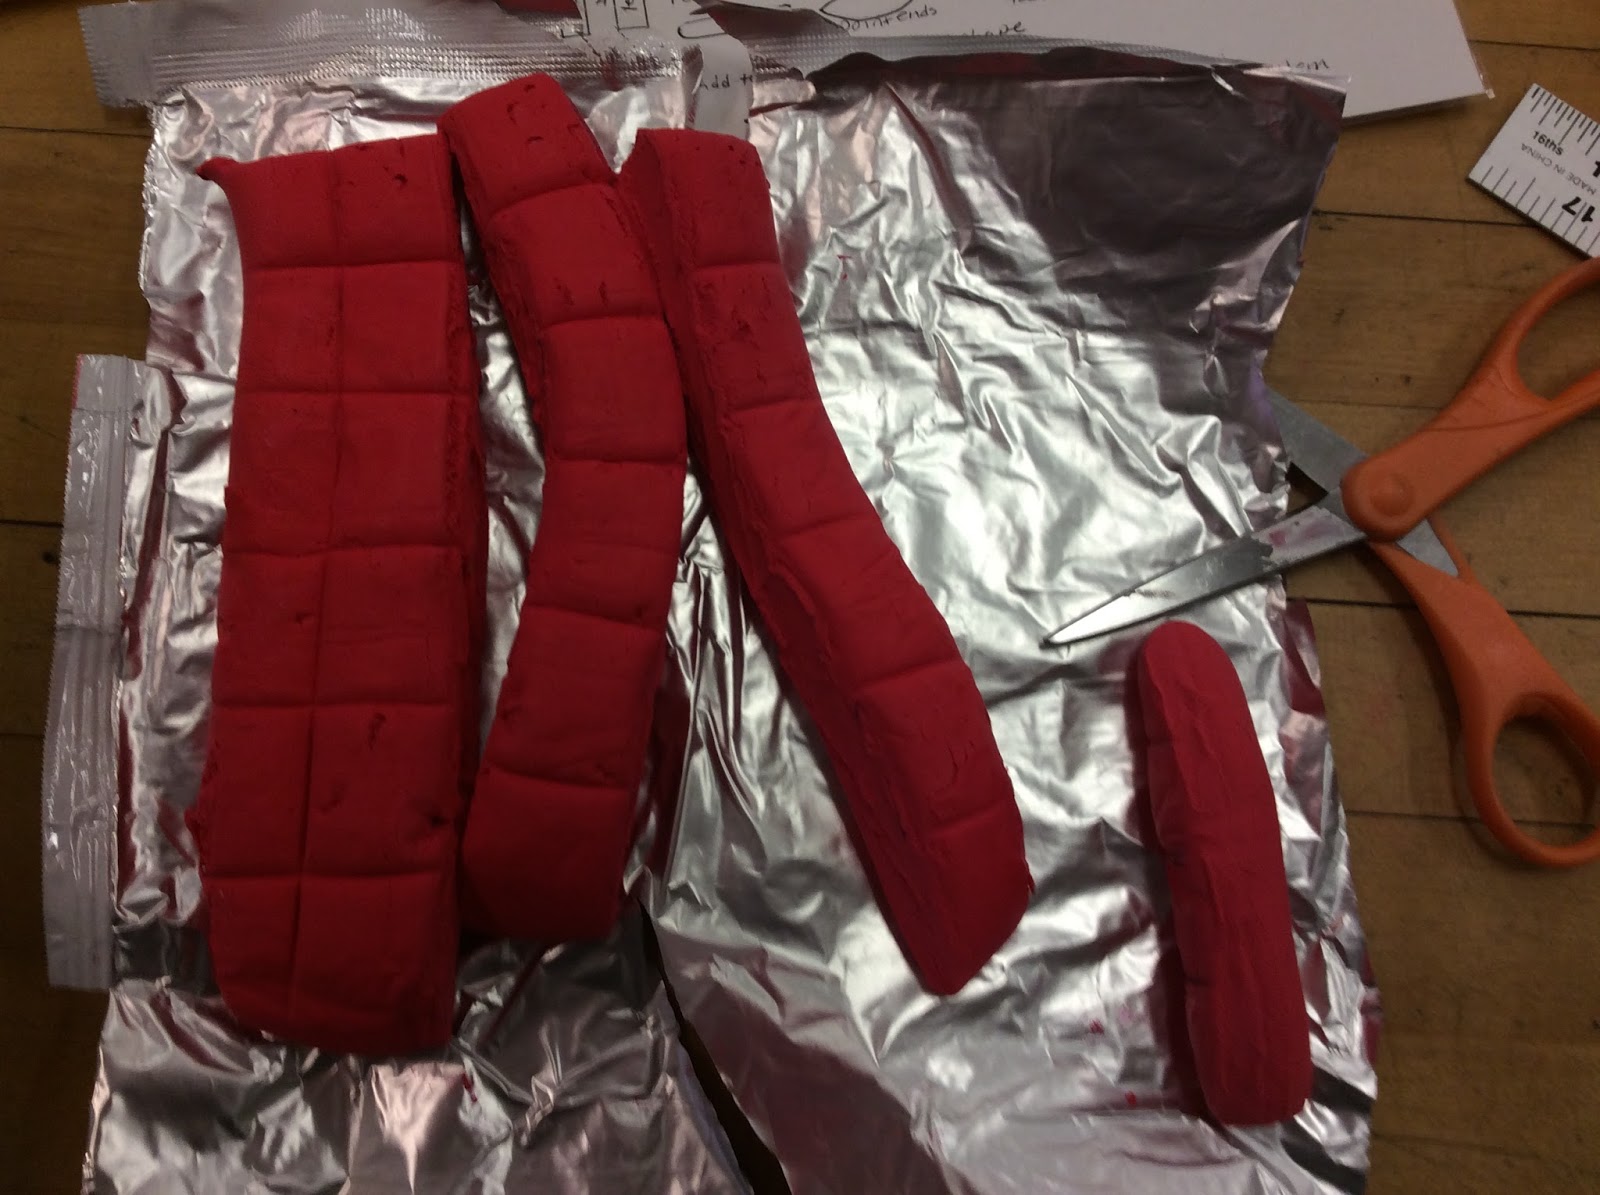
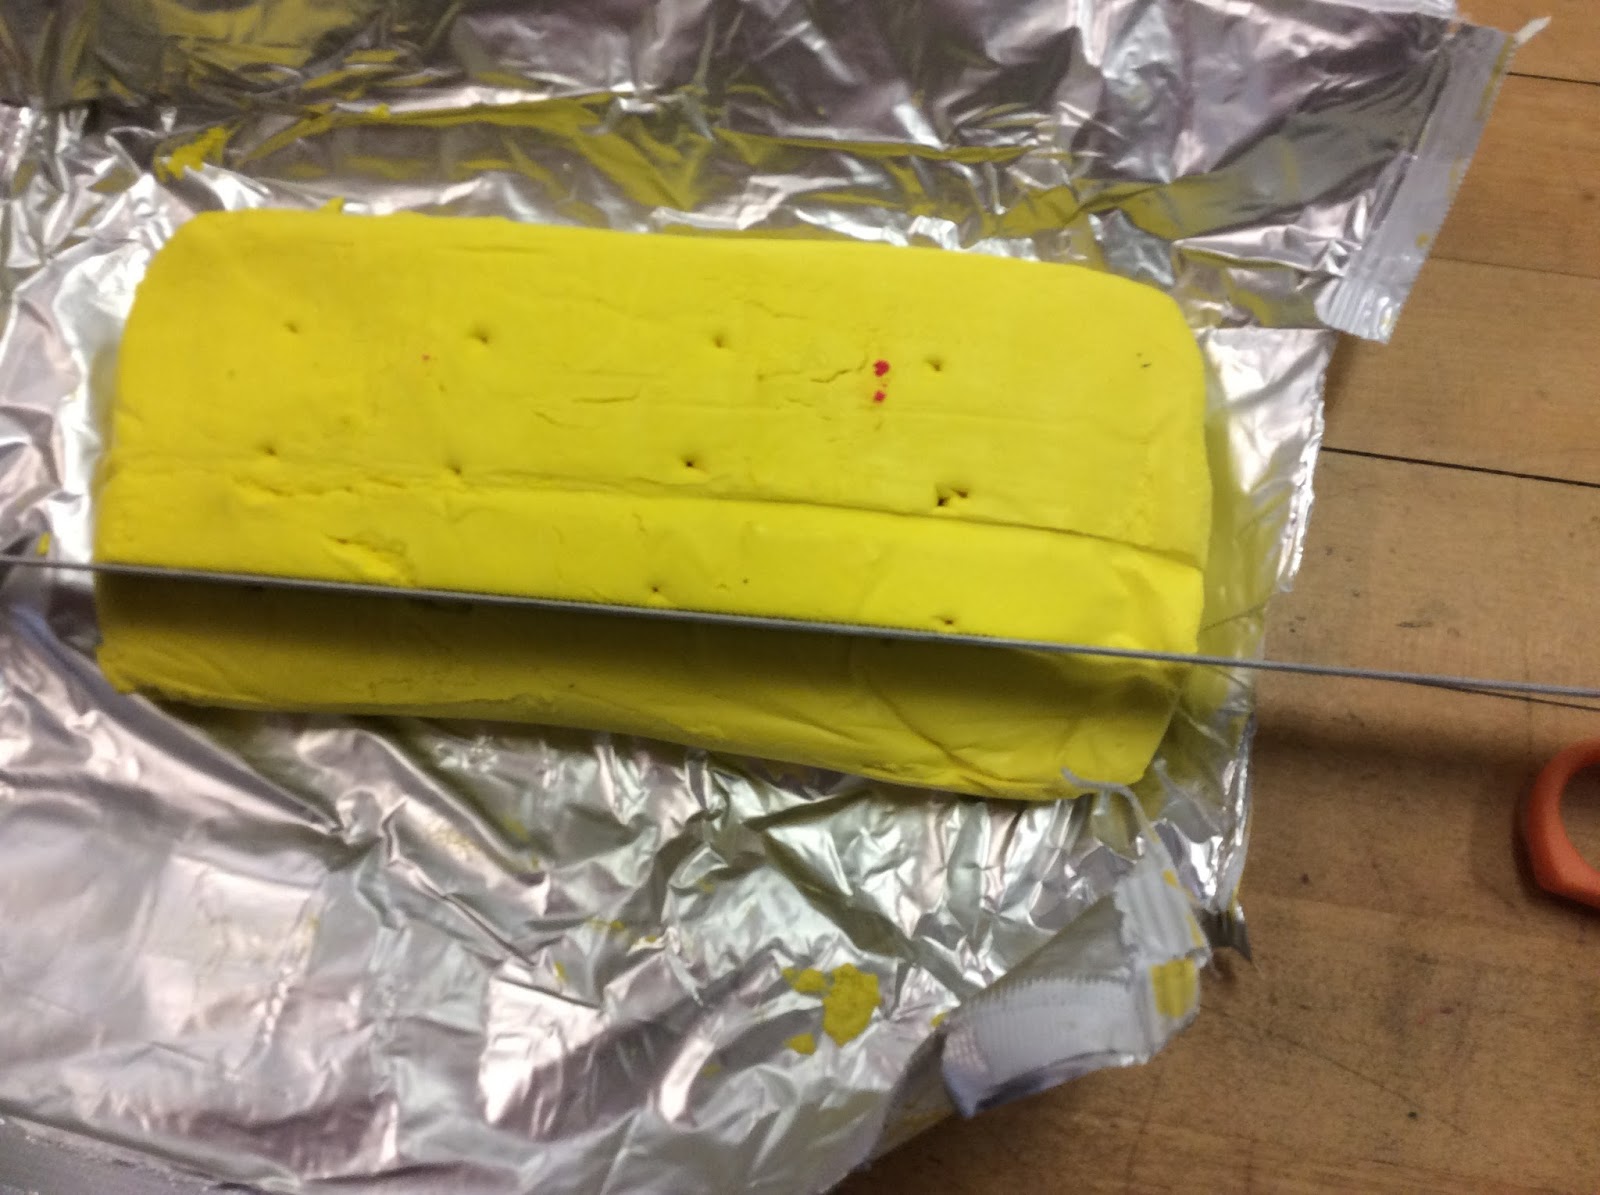
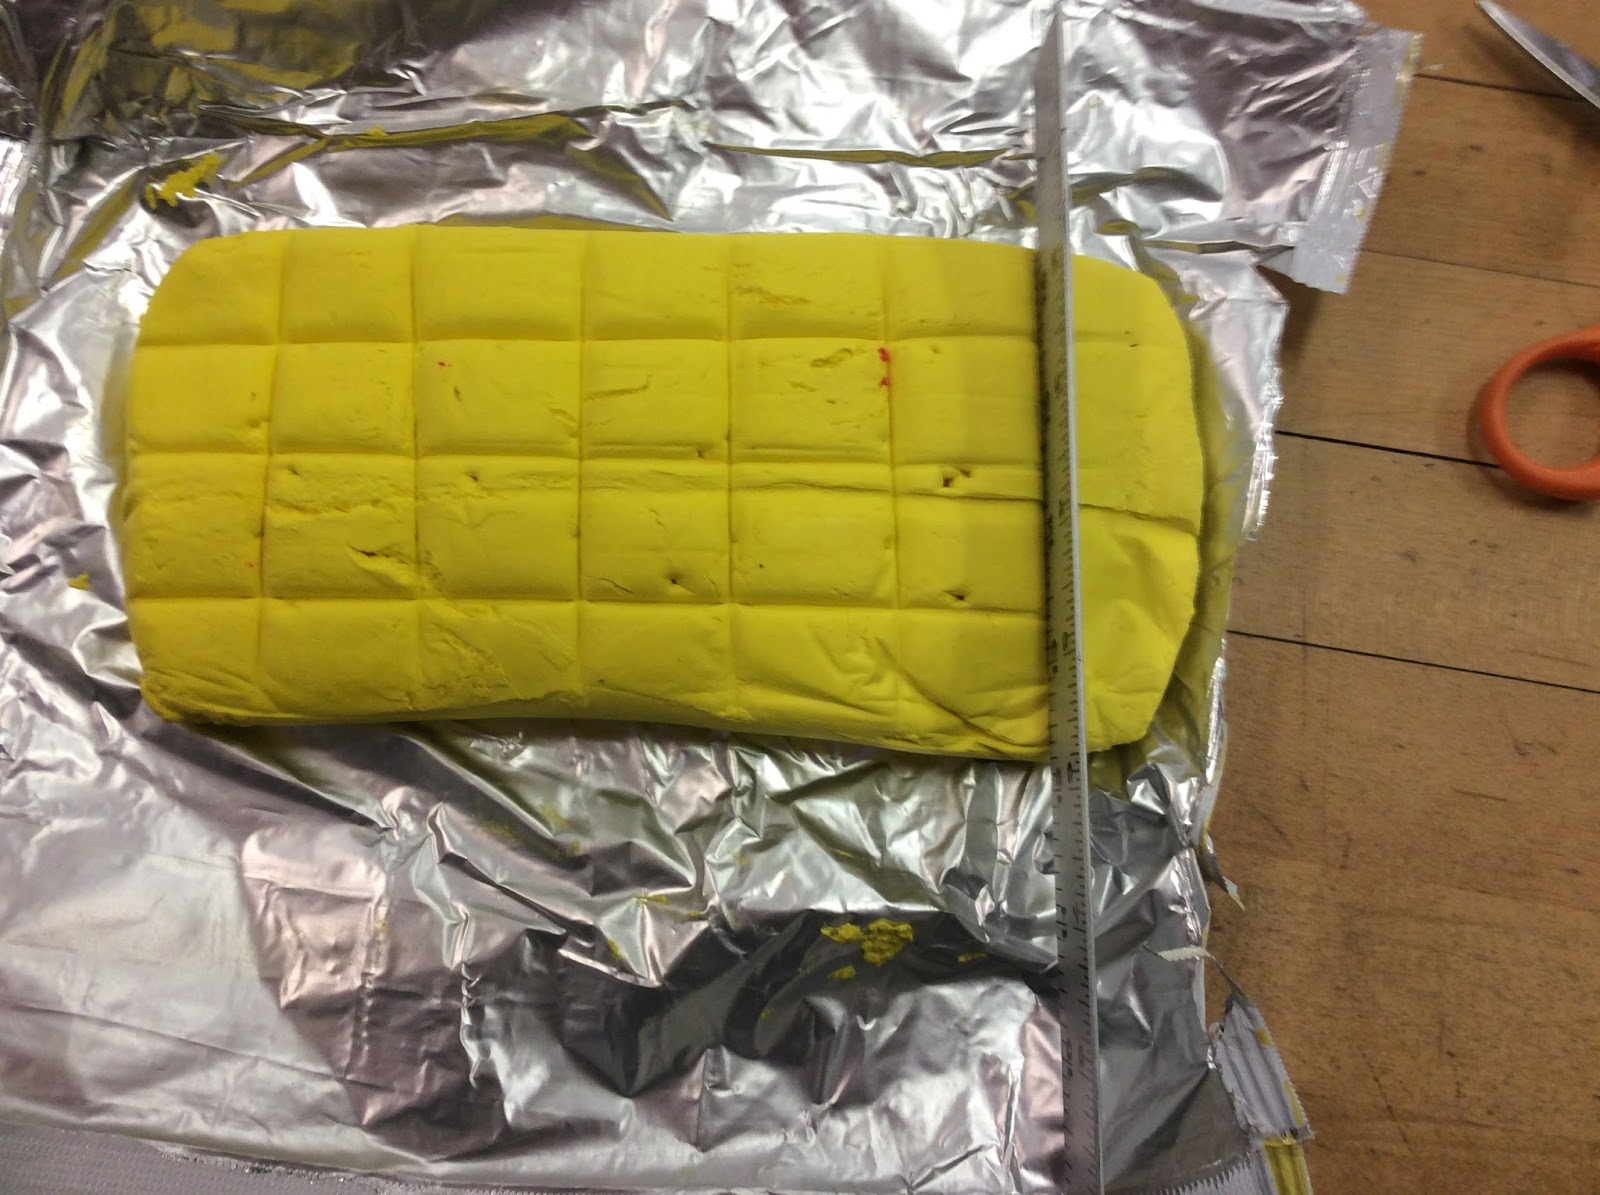
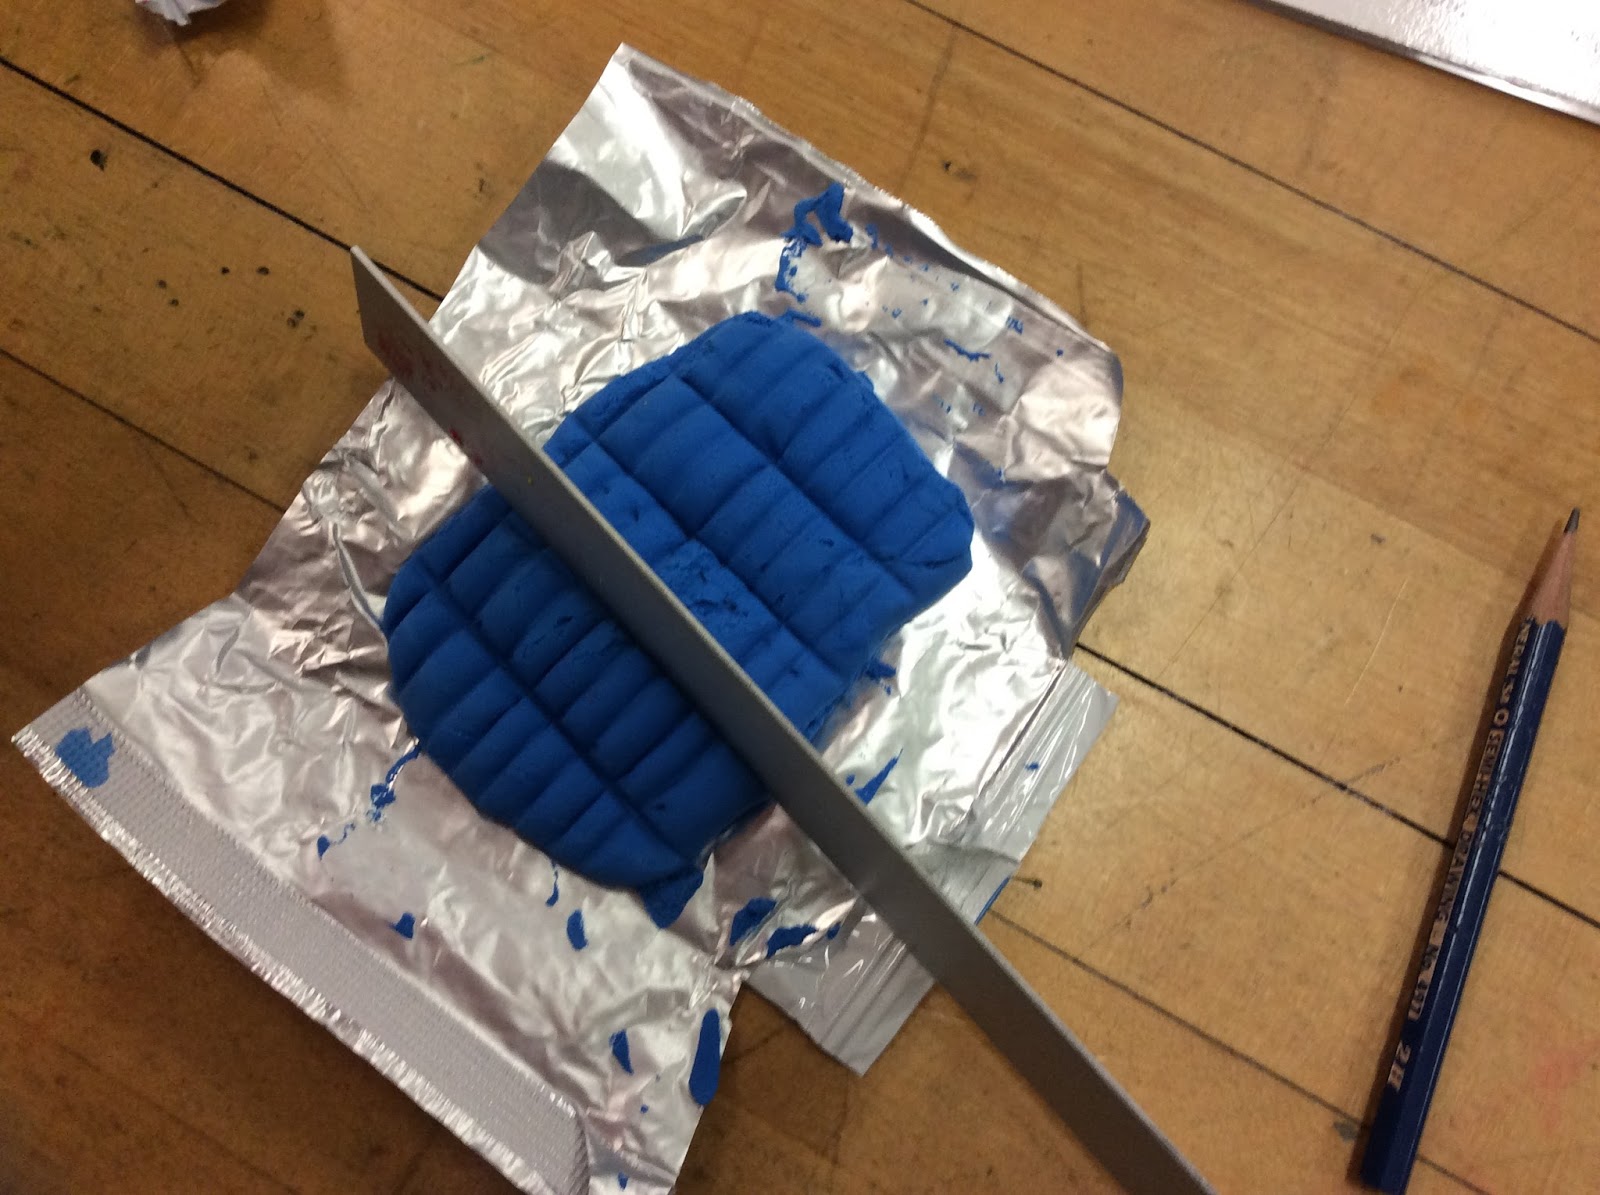
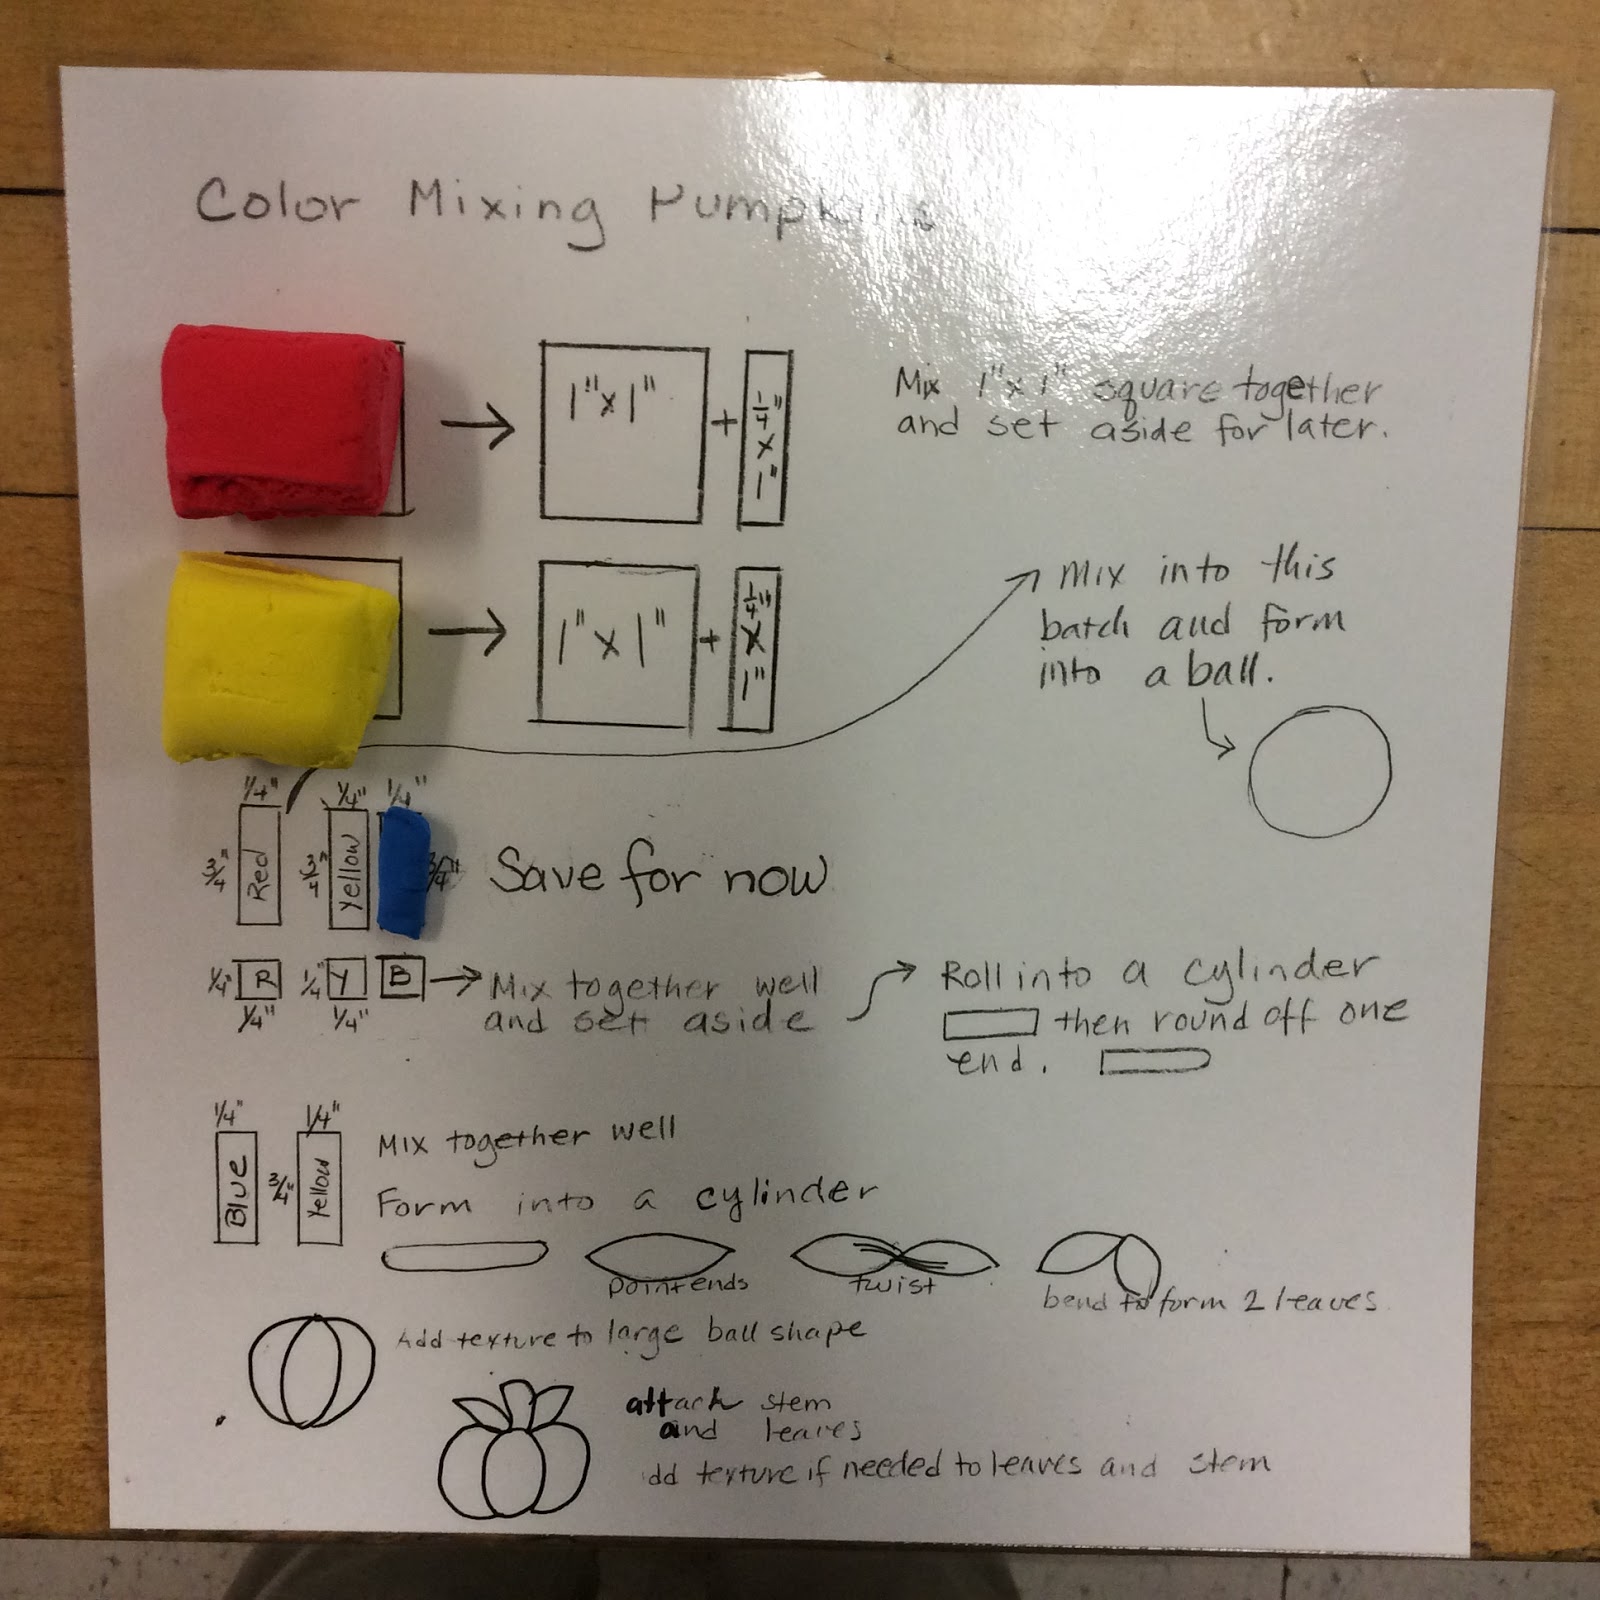
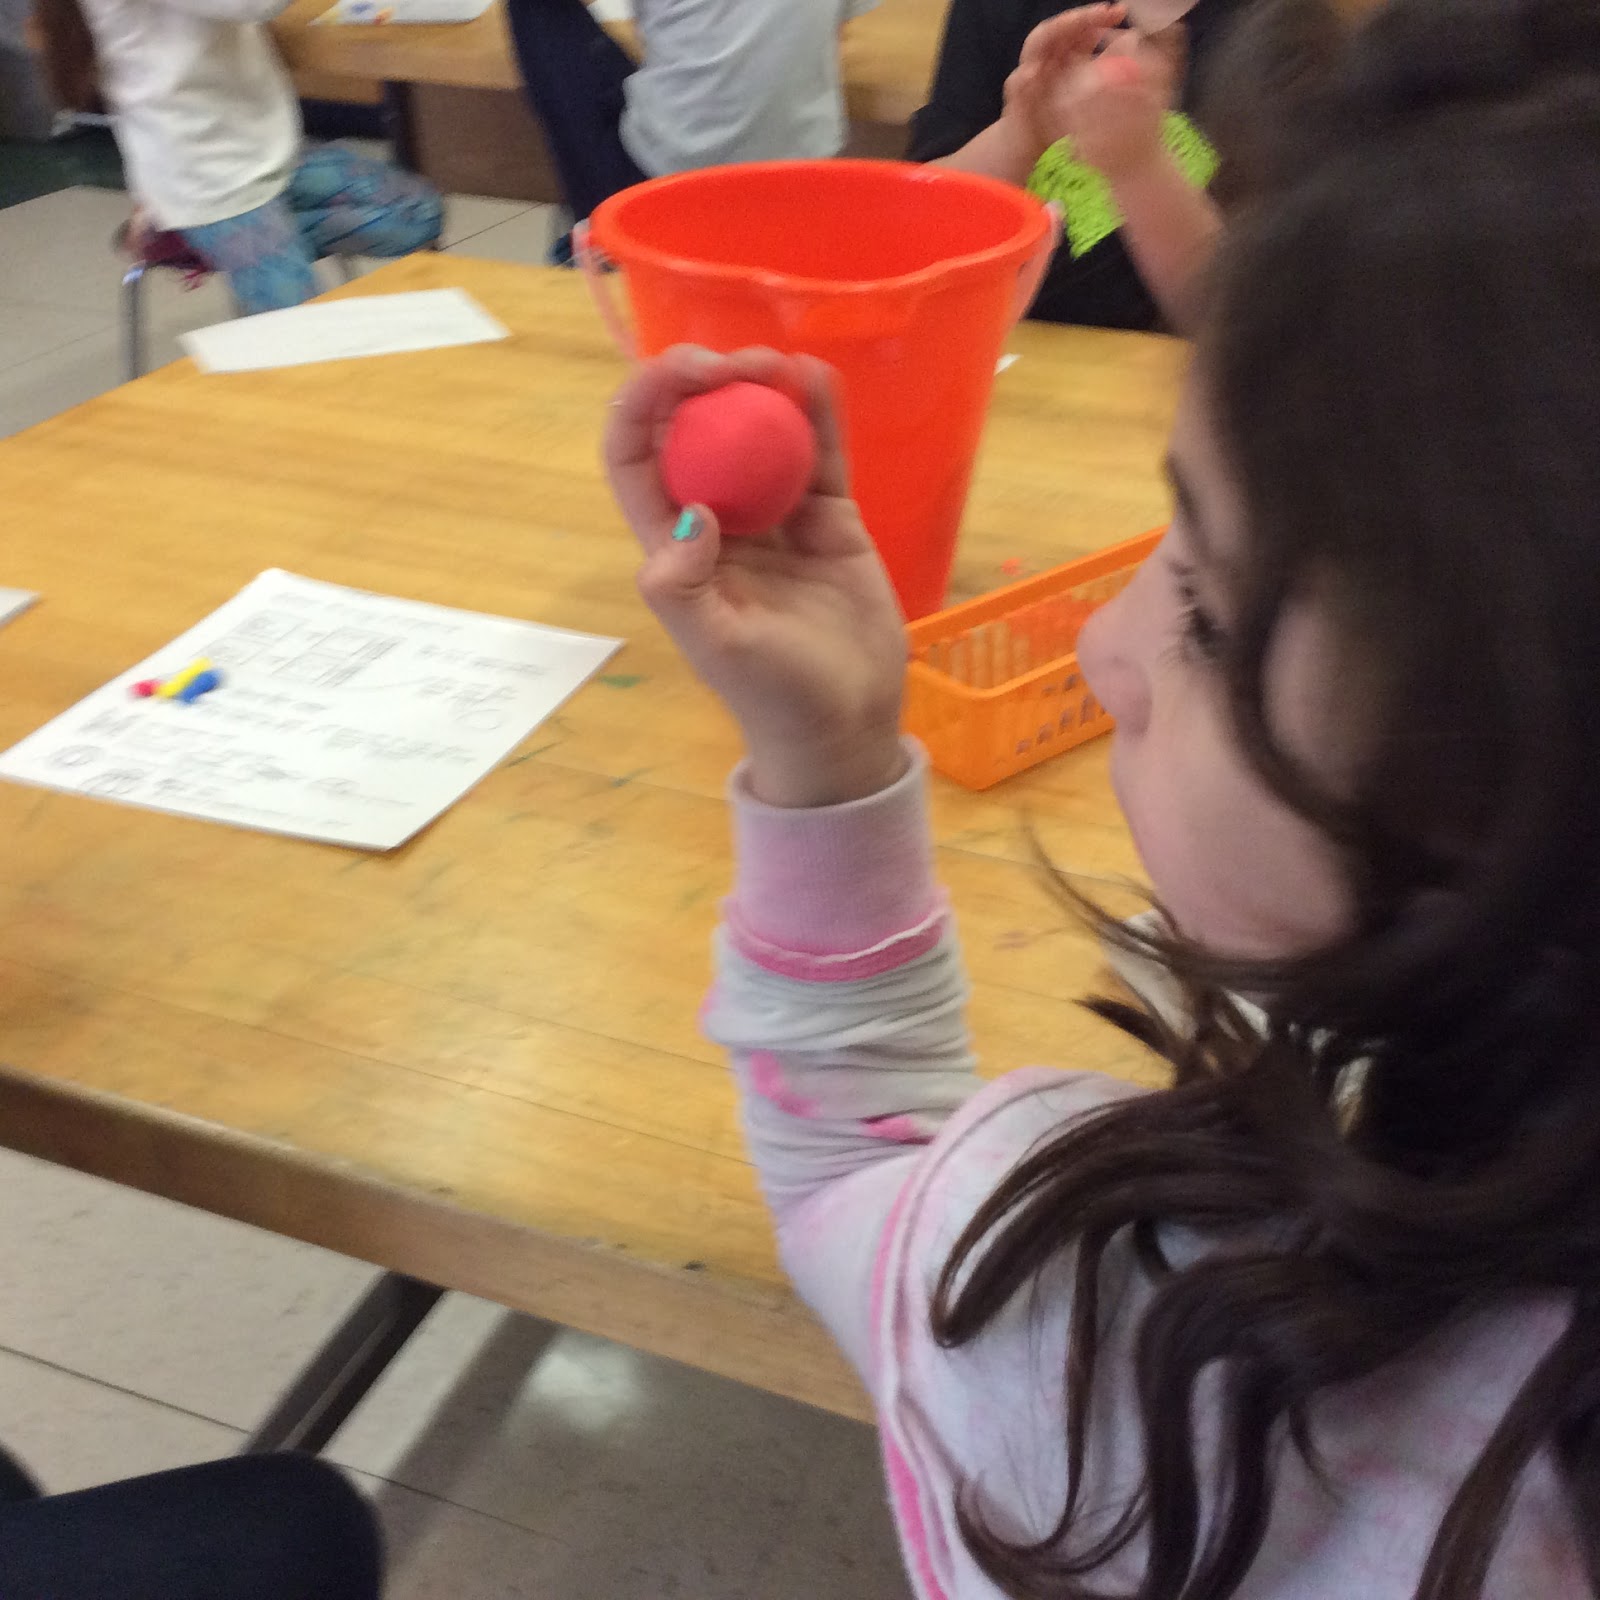
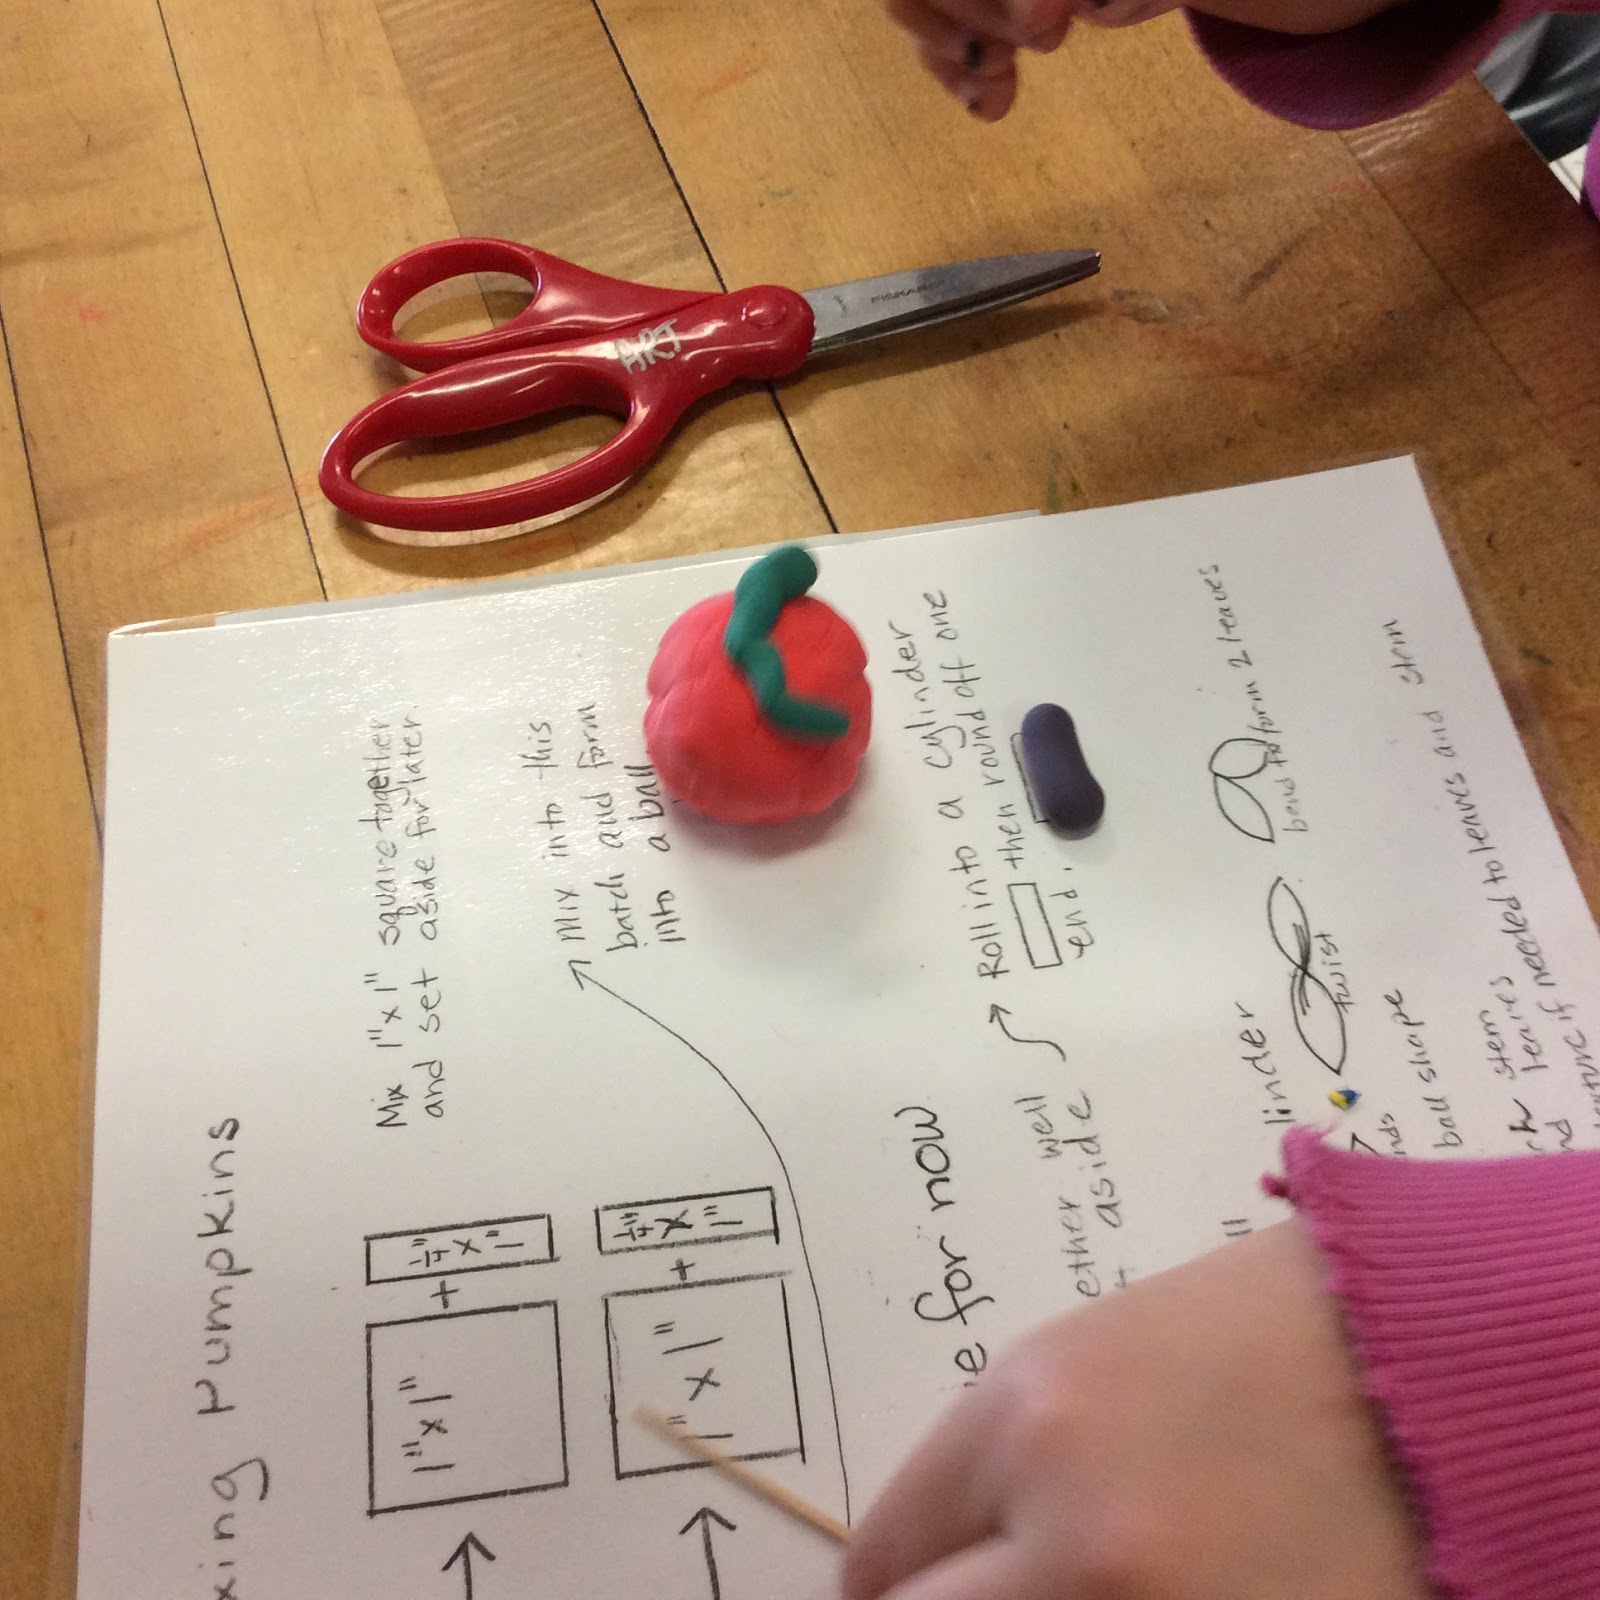
I have done this project with my 2nd grade students for a number of years but felt I wasn't making the strong Math connections that I wanted.  I was motivated to create a template for the project where students could more closely be involved in the measuring of the clay  to make clearer connections.  Here is the template I created.   I made enough copies so each child would have their own and ran them through the laminator.  It can be used like a place mat to actually do the work on.

First I measured out the red, yellow and blue model magic clay for each student.
I use scissors to cut the individual pieces.
Measure off pieces and mark in the clay
Use a ruler to connect the marks
I used the side of the ruler to connect the dots and mark the cutting lines


Blue pieces are much smaller

I began by handing out the three colors of clay that were needed:

The place mat ready to begin

First step, mix red and yellow 1" pieces together.  Add in an extra piece
of red that measured 3/4" x 1/4".  This gave a red-orange
color for the pumpkin.
I conducted this project as a directed activity, walking them through each step, one step at a time.


Next the brown for the stem was formed by mixing the very small
pieces of yellow, red, and brown. 1/4" x 1/4"  The 3/4" by 1/4"
yellow and blue were mixed to make the leaves.


Placed on a tray with student's names until they are dry
enough to write on the bottom with a sharpie


Tuesday, September 30, 2014

Kindergarten Formative Assessments

Student Project
How do you determine baseline levels for your new incoming students?  For years I have been using this project as my initial assessment of student skills.  I tell my students it is a "follow the leader draw".  As educators we call it a directed lesson.  As I begin the lesson I determine student understanding of line names such as horizontal, vertical and diagonal.  Some usually are familiar but not necessarily comfortable with the words.  I have students draw with their "magic pencils" (index fingers) in the air in front of them as I say the word for the line and then they repeat it back.  We do this for several repeats as they draw first horizontal lines from edge to edge of the paper, followed by vertical lines and finally a few diagonal lines.  Next we embark on the primary colors and shapes.  The lesson might go: color a rectangle red.  I would ask someone to tell me what a rectangle might look like before they color.  A square could be blue or yellow and the final color would be a triangle.  Each time someone shares what the shape should look like so that all students are able to identify the shape they should be coloring.  Secondary colors are introduced by combining the primary colors.  "What will happen when we mix red and yellow?"  This happens for all three secondary colors as more shapes are colored and circles are drawn and colored.  The entire lesson involves active student participation in the discovery with much repetition of words and concepts.  As they work I am constantly taking in the process and looking for struggling students and competent students.  As we all know, there is a huge discrepancy in skills with incoming Kindergartens some years.  This lesson really gives me an overview of what I need to focus on and whether students have already mastered basic skills due to PreK exposure or home involvement.

Student Project

Wednesday, February 26, 2014

Kindergarten Assessment

I was browsing on Pinterest some time ago and found a great shapes game handout that I thought would be a lot of fun for my younger students.  I pinned it and moved on until recently.  I needed a baseline assessment for my Kindergartners to see what they had learned thus far in the school year.  I remembered the game and decided to try to alter the game a bit and turn it into a formative assessment.  Here is my adaptation.  Thanks to whomever initially created the game.

Saturday, November 30, 2013

Writing Lesson Plans

I have a professional afternoon on Tuesday and will be missing my Kindergarten students.   It's easy to plan for the older grades, I have them chose a lesson from their sketchbooks but I always feel a bit challenged coming up with plans for a substitute to use with Kinders.  It has to be easy enough for anyone to guide students, challenging enough to last the full class time, and engaging enough so that behaviors won't become a problem.  In a capsule, it's hard to find that perfect lesson.  As I have mentioned before, I always start a Kindergarten lesson with a book.  For this lesson I have chosen "Not a Box" by Antoinette Portis.  I could not find my lesson plan format saved on my computer, how do those things always seem to disappear?  I headed to the Internet for some guidance which is the purpose of this post.  I discovered a really terrific lesson plan generating site that I want to share with  you. The site is here and is called the Lesson Builder.  It is free, easy to use and creates a truly impressive looking lesson plan to leave for a substitute or to turn into an evaluator.


"Not a Box"
Grade Level : K
Subject:  Visual Arts
Topic: Kindergarten Shapes and visual imagery

Objective: Kindergarten students will be able to identify and name shapes and
then make associations to everyday objects that are reflective of those shapes

Prep:  Photo copy pages of shapes, one per student. Collate and staple together into a book. Cut covers in a variety of colored papers for students to chose from. Add student names to back cover of book.

Materials:  Book: "Not a Box" by Antoinette Portis, copies of handouts, construction paper, crayons, Shape activities for "Not a Box" from The Best Children's Books.org.  I will be using these for the first step of the lesson


Common Core Standards Met:  (This was a drop down menu which I selected from)

Math.K.G.2 Correctly name shapes regardless of their orientations
or overall size.
Math.K.G.5 Model shapes in the world by building shapes from
components (e.g., sticks and clay balls) and drawing shapes.


Method: Direct Instruction   (This was a drop down menu which I selected from)
Goal:  Build Understanding   (This was a drop down menu which I selected from)
Students will listen and interact with a reading of "Not a Box" by
Antoinette Portis.

They will be given a set of shape illustrations that they will identify by
appropriate name. Students will color in the shapes using primary and
secondary colors (crayons).
In the style of Portis' book, they will then turn the shape into an
imaginary object or an actual object that incorporates that shape. (ex:
cone - ice cream cone or top of a tower)
Next - Color in drawings.
When finished staple on a cover using constructions paper which students
will illustrate.


I'll let you know how the lesson goes on Tuesday with the substitute.  Until then, be sure to check out the Lesson Builder.

Tuesday, October 1, 2013

October and it's Pumpkin Time!

Ruby's pumpkin with multiple stems
David's Pumpkin with long stem

Codey's pumpkin with cylinder stem
This is one of the favorite projects for my 2nd grade students each year.  The purpose of the lesson is to review color mixing and the lesson touches on Math connections as well.  Students are given a piece of red model magic about 1 1/2" x 1/2" and they are to divide it into three sections.  A similar section of yellow model magic is divided in the same way.  Students take 2/3 of the red clay and 2/3 of the yellow clay and mix them together to discover they are making orange clay.  It is formed into a ball and a toothpick is used to slightly indent the clay to make the pumpkin ridges.  The pumpkin ball is slightly flattened on the bottom to keep it from rolling around.  The remaining red and yellow pieces of clay are divided into two halves.  A very small piece of blue clay is handed out and divided in half.
Emma's pumpkin with stretched stem
Students combine 1 of the blue pieces with one of the yellow pieces to form a green piece of clay.  This is rolled into a cylinder.  The ends of the cylinder are slightly pointed and flattened a small amount.  The toothpick is again used to add details to what will now form the leaves.  The remaining clay is mixed to form a brown for the stem.  Colors will vary depending upon how large or small students have made the sections of clay as they divided.  The brown is rolled into a cylinder for a stem and them stretched if desired to make it look more like the stem of a pumpkin.  

Friday, September 20, 2013

First, Second and Third Graders Dot Day Bulletin Boards

First grade students explored color mixing for International Dot Day this year.  Liquid watercolor in the primary colors was used with a dropper to create secondary colors on a coffee filter.  Here is is the bulletin board displaying all of the dots.

2nd and 3rd graders bulletin board for Symmetry and Asymmetry


Saturday, September 14, 2013

September 15 - International Dot Day!

Finally my students began their Dot Day projects on Wednesday.  Many of them were too wet to photograph.   Here are a few to share.  The older students will be posted later when there are some completed projects.
1st grade "Dots" in the dry rack

A few dry 1st grade dots
First grade students used pipers and liquid watercolor in the primary colors to create their dots after a reading of  "The Color Kittens" by Margaret Wise Brown.  The purpose was to create the secondary colors in a tye dye effect.  Some students delighted in the mixing and created a secondary color dot.

Second grade students created symmetrical dots using the primary colors and tempera paint.  The dots used for both projects were coffee filters.


2nd grade symmetrical dots

Tuesday, July 30, 2013

Two new books for use in Kindergarten

If you haven't read the book Lacey Walker, Nonstop Talker, you must check your local bookstore or library for a copy.  I can't wait to read this charming little picture book to my classes when the school year begins.   I always like to let my students talk quietly while they create if they wish but for some students,  they can't seem to regulate their talking.  This little book tells the story of Lacey Walker who loses her voice and discovers all she has been missing out on with her non-stop talking!  I absolutely am charmed by the story.  It is written by Christianne Jones and illustrated by Richard Watson.

The second new book for the fall is The Day the Crayons Quit by Drew Daywalt and illustrated by Oliver Jeffers.  If you are not familiar with Jeffers, you will recognize his art from other books you have probably used in your classroom.  You can learn more about him here.  This picture book tells of the frustration experienced by a box of crayons over the way their owner uses them.  Some feel overused, some under used and others limited in what they are allowed to color.    I recommend both to you for your classroom collection.  It has been selected by Amazon as one of the Best Children's Books of the Year.

Monday, July 22, 2013

Have you found these, yet?

I found these today at my local discount store and immediately bought a box of each.  My only disappointment was not finding a box of the orange hues.  I will definitely use these as teaching tools when working with values and tints or color families and warm and cool colors.  Love them!   Anybody else have any ideas for the new, nouveau, crayons?

Sunday, January 6, 2013

A project that impresses


            Sol LeWitt inspired 3D sculptures

This is one of my favorite projects and it morphed out of a project on color theory.  Each year I have my fourth grade students demonstrate an understanding of Primary, Secondary, Complementary and Analogous color schemes by creating pattern papers.   After visiting a Sol LeWitt exhibit at Mass MOCA a few summers ago, I integrated the works of Sol LeWitt into the lesson, sharing with the students LeWitts's ability to create amazing works of art with very
basic color combinations.  We study his transitional styles and talk about his integration of math into his work.  Lastly, we share the fact that LeWitt creates the ideas for his works but the process is actually completed by other people.  The students find that to be a very fascinating fact.  
Last year I decided to take the papers and use them to extend the lesson and the sculptures are the end produce.   The papers are cut into triangular shapes, I created tracers that are used by my students.  The triangles are traced on the back of their paper and then cut apart.   Using a wood stylist, the triangles are then rolled into paper beads or tubes.   The tubes are then   glued to form angles.  So we have transgressed back to a math connection with the project. Taking two of the tubes at a time, students glue them to form right angles, acute angles and isolates triangles.  Every connection must form an angle.   The angles are glued to a poster board base about
4 1/2 x 6".  The sculpture is built both up and out with the focus on angle.   Anything is acceptable as long as it forms an angle.  Here are a variety of the completed projects.