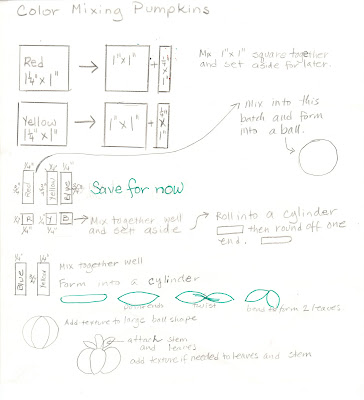
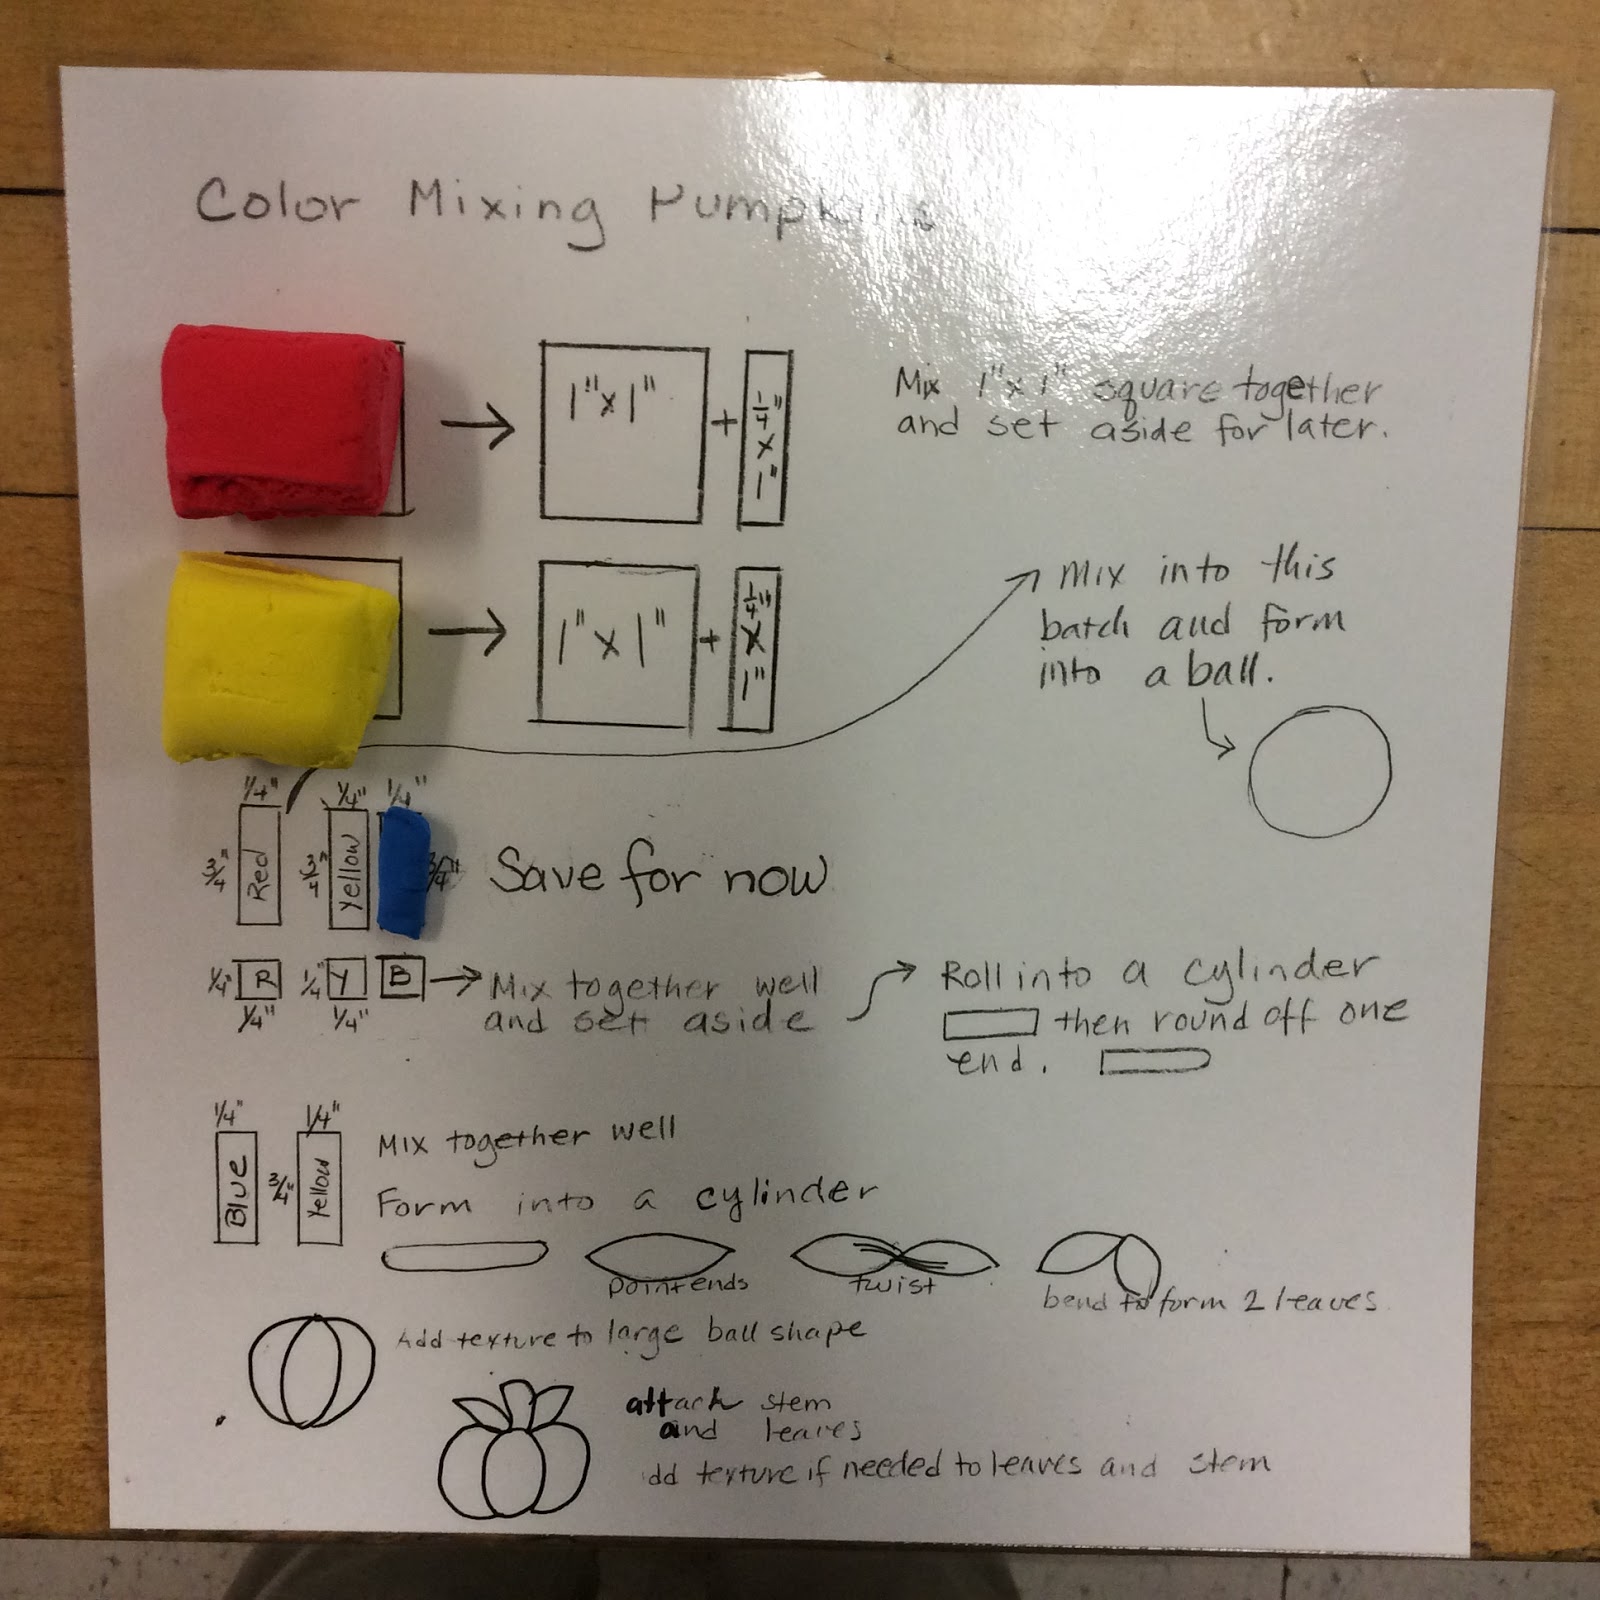
I have done this project with my 2nd grade students for a number of years but felt I wasn't making the strong Math connections that I wanted. I was motivated to create a template for the project where students could more closely be involved in the measuring of the clay to make clearer connections. Here is the template I created. I made enough copies so each child would have their own and ran them through the laminator. It can be used like a place mat to actually do the work on.
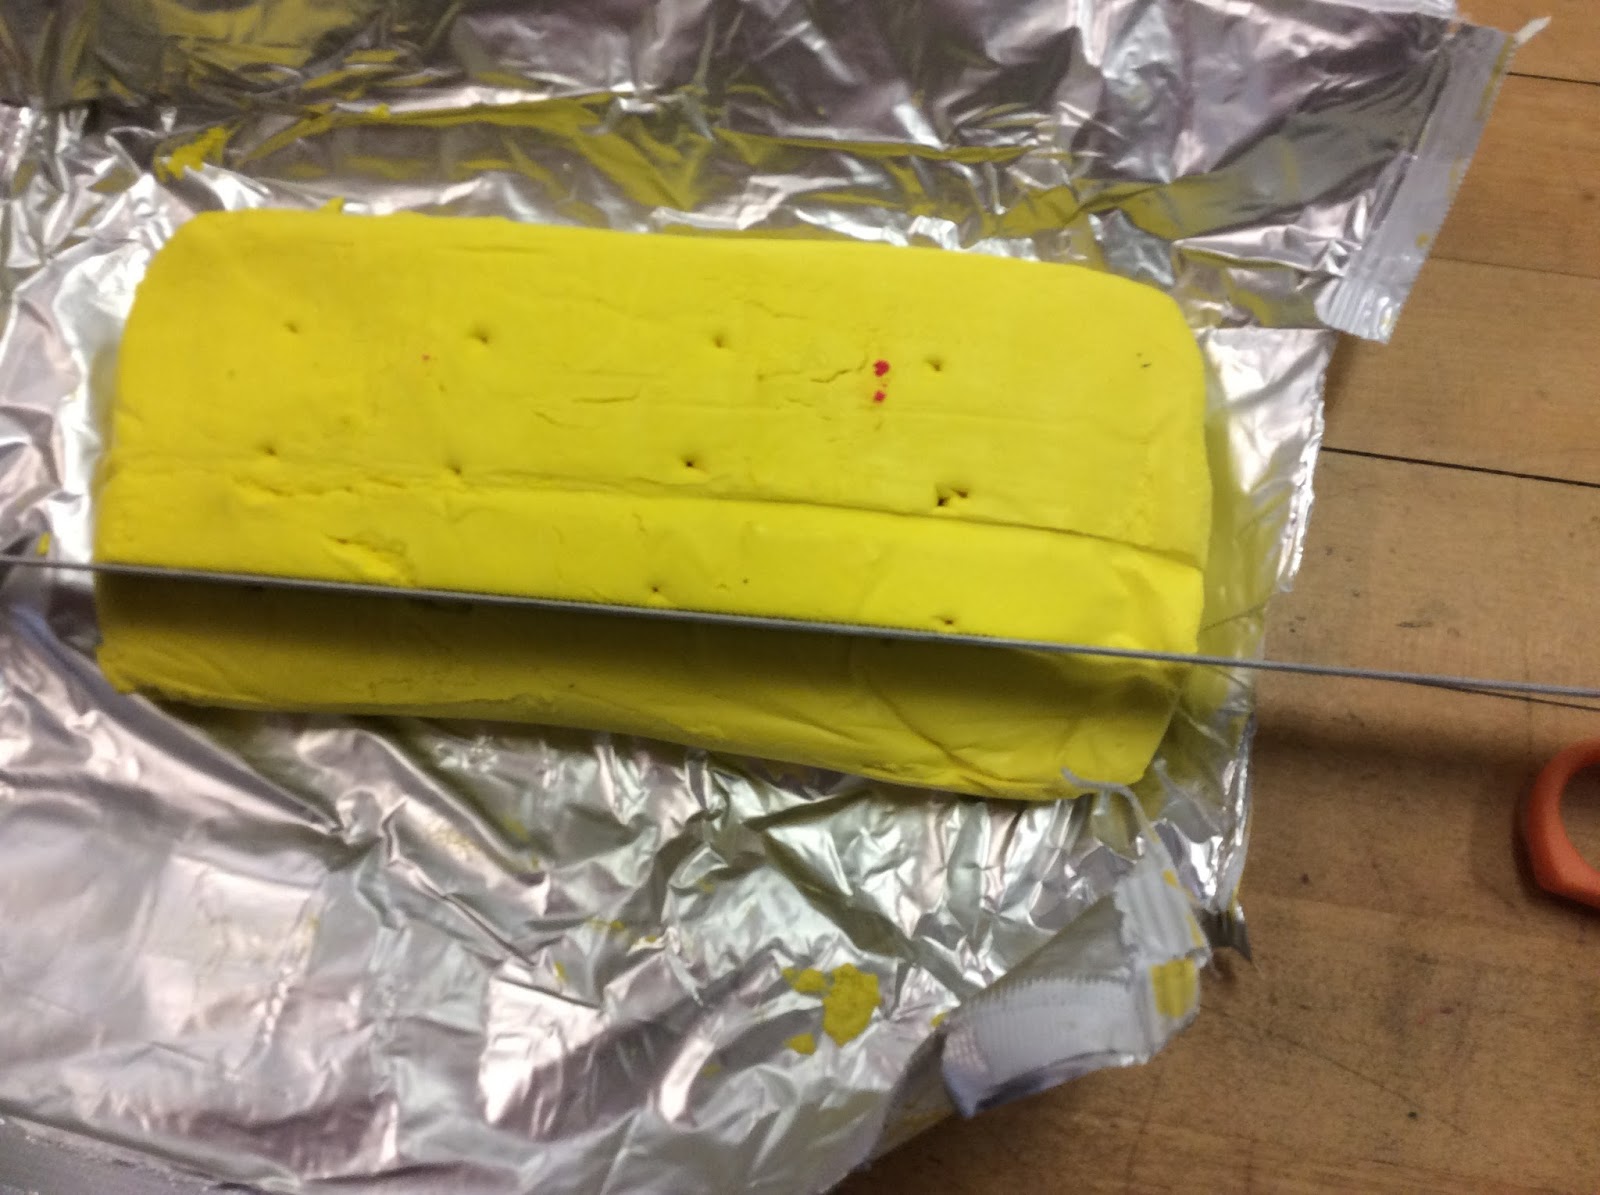
First I measured out the red, yellow and blue model magic clay for each student.
 |
| I use scissors to cut the individual pieces. |
 |
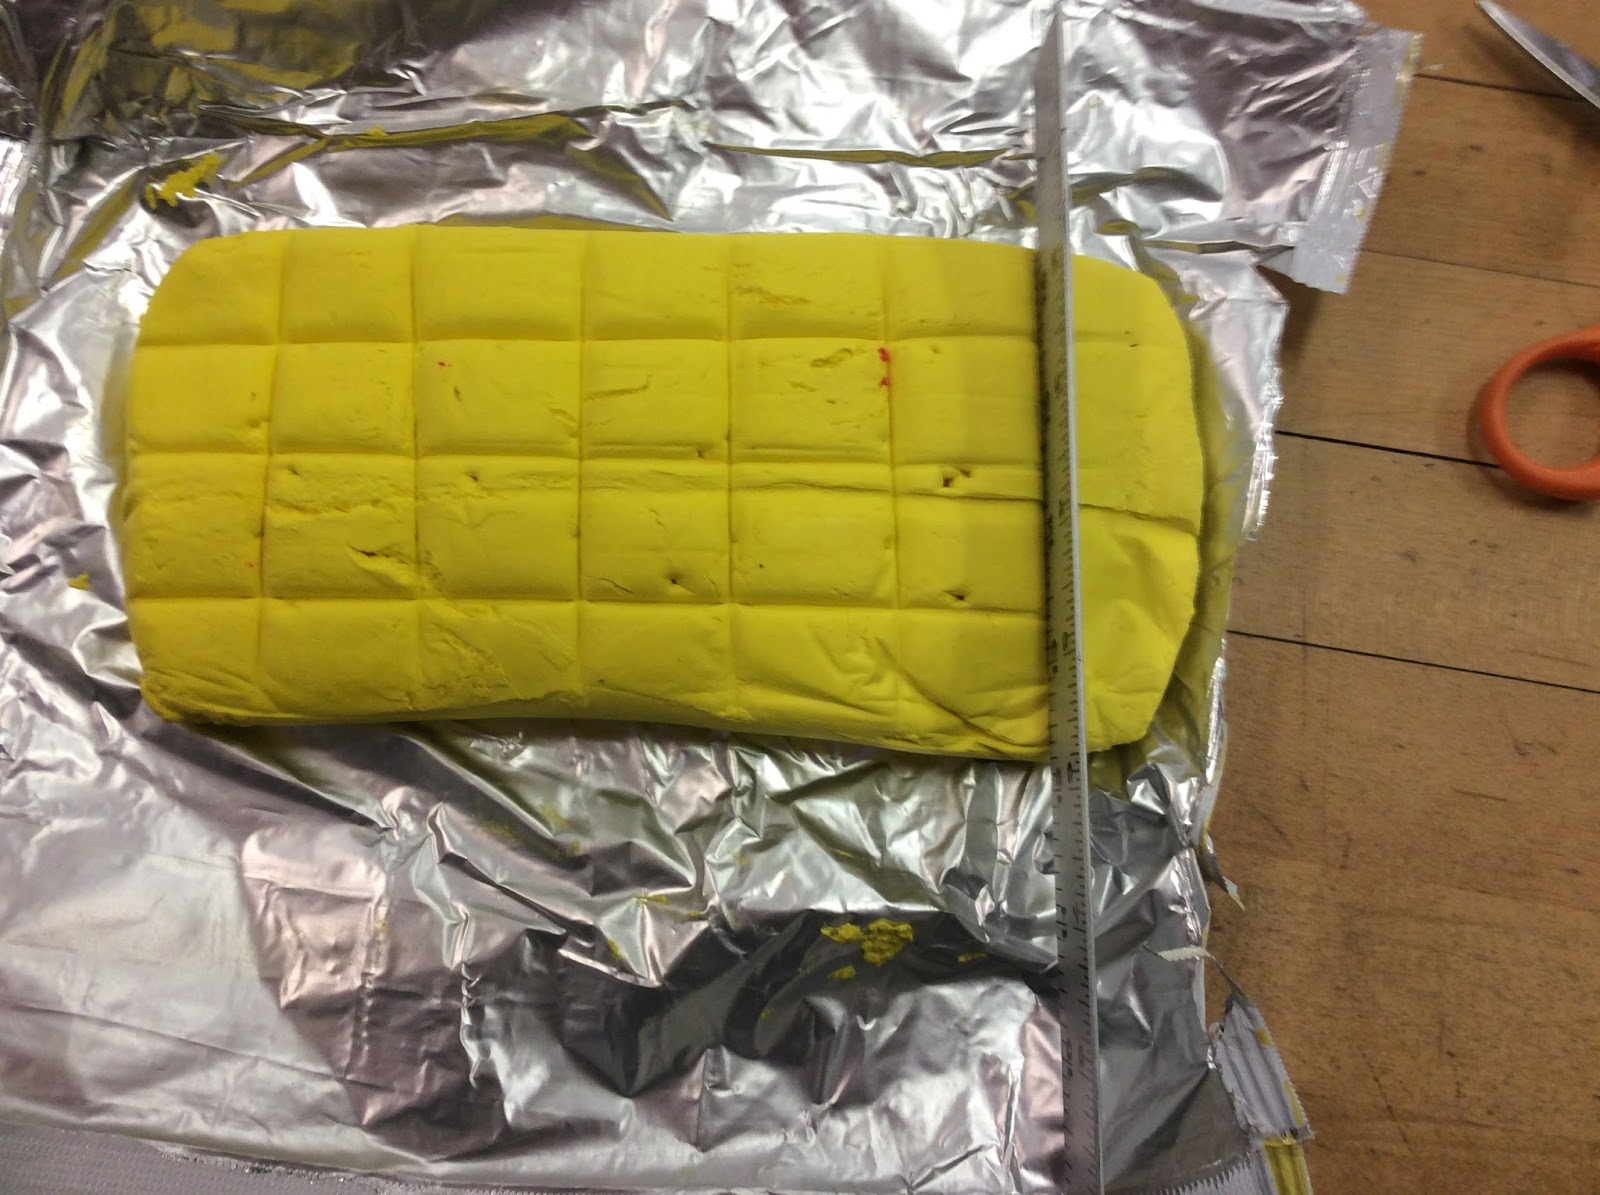
| Measure off pieces and mark in the clay |
 |
| Use a ruler to connect the marks |
 |
| I used the side of the ruler to connect the dots and mark the cutting lines |
 |
| Blue pieces are much smaller |
I began by handing out the three colors of clay that were needed:
 |
The place mat ready to begin
|
 |
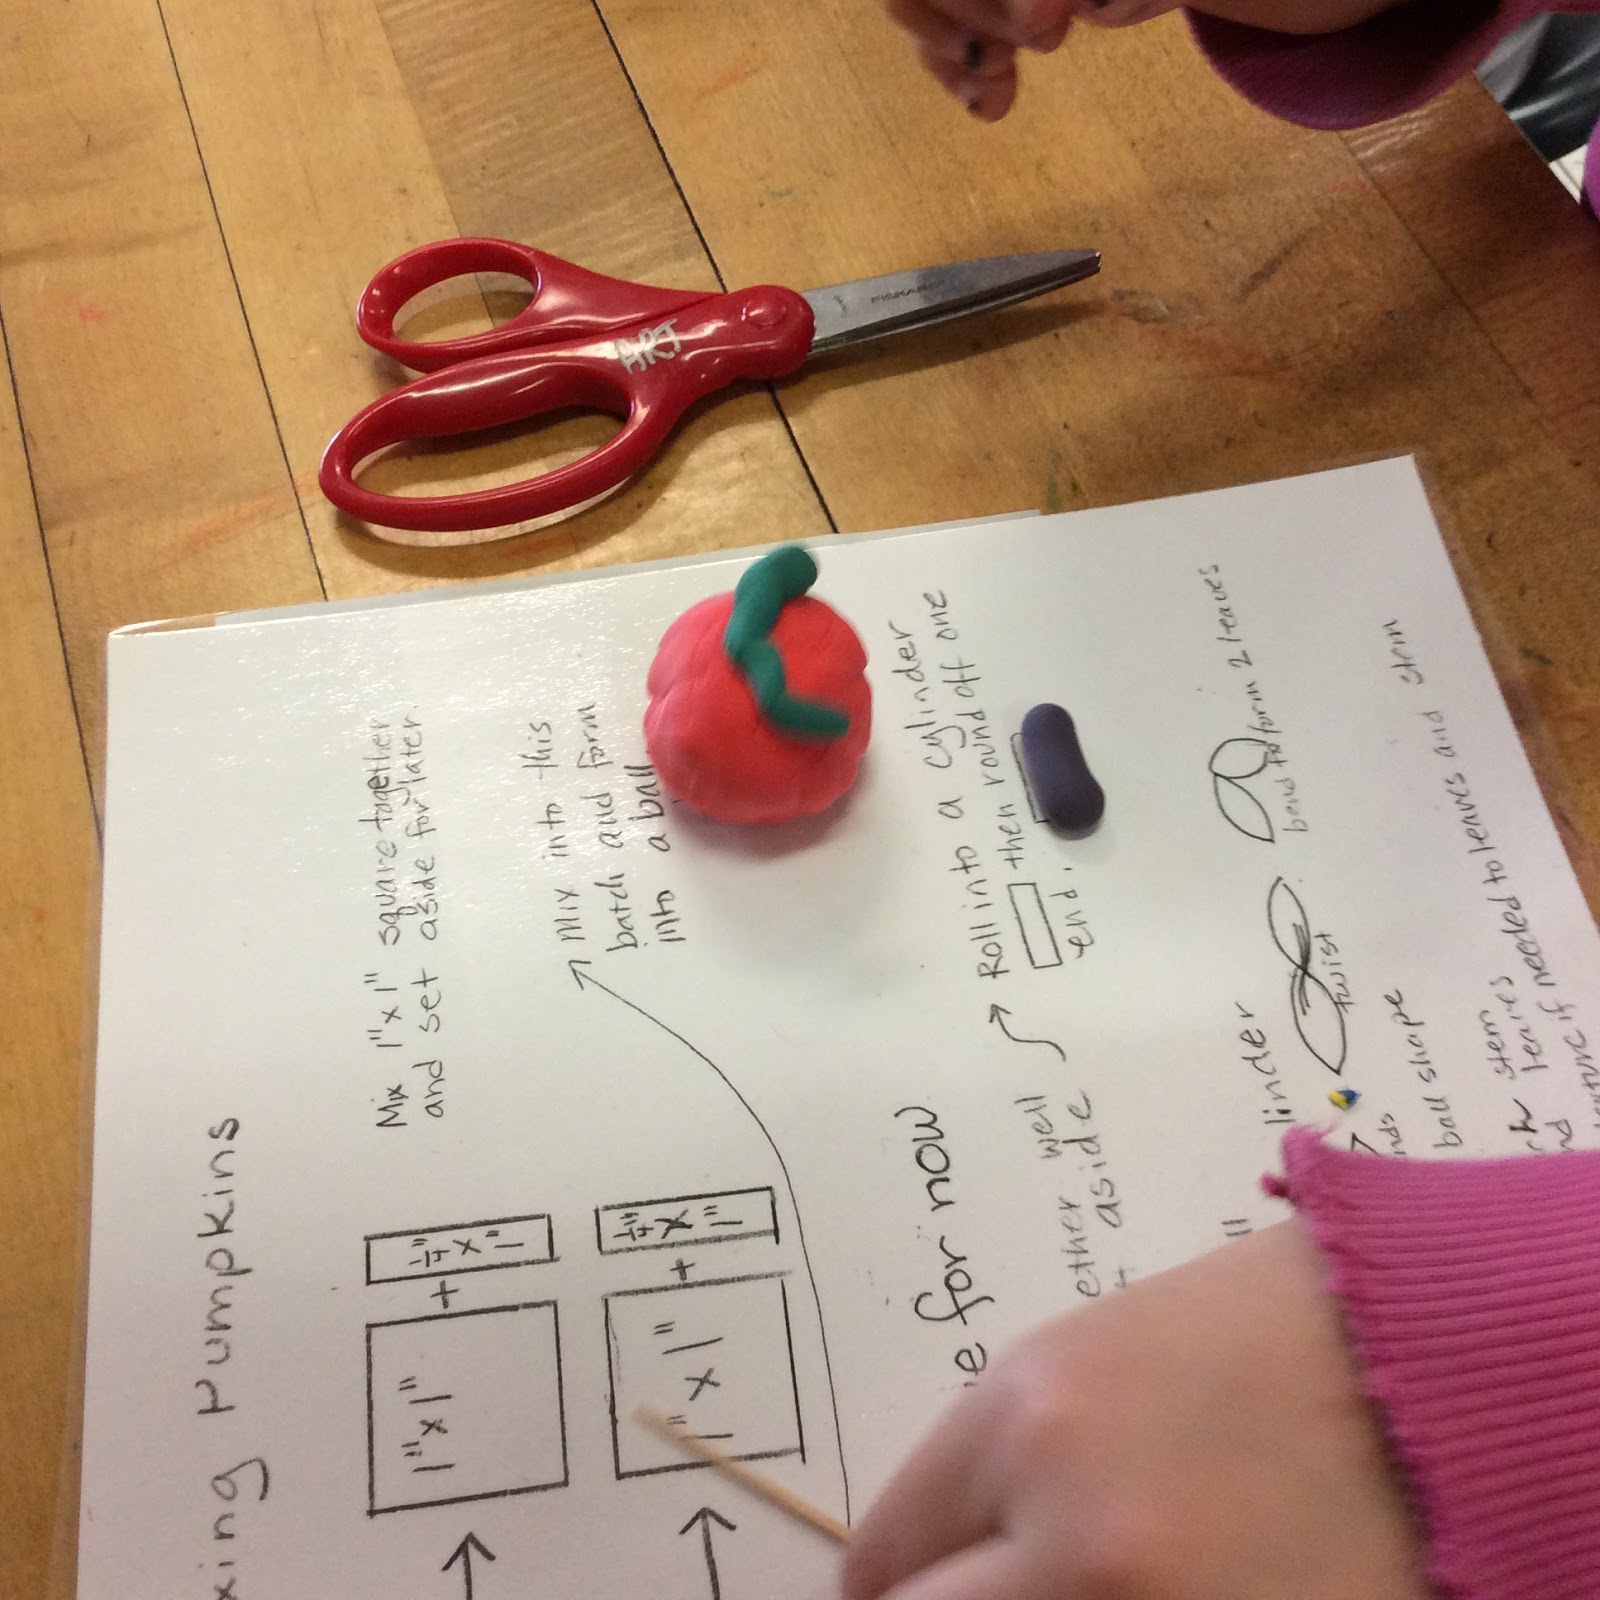
First step, mix red and yellow 1" pieces together. Add in an extra piece
of red that measured 3/4" x 1/4". This gave a red-orange
color for the pumpkin. |
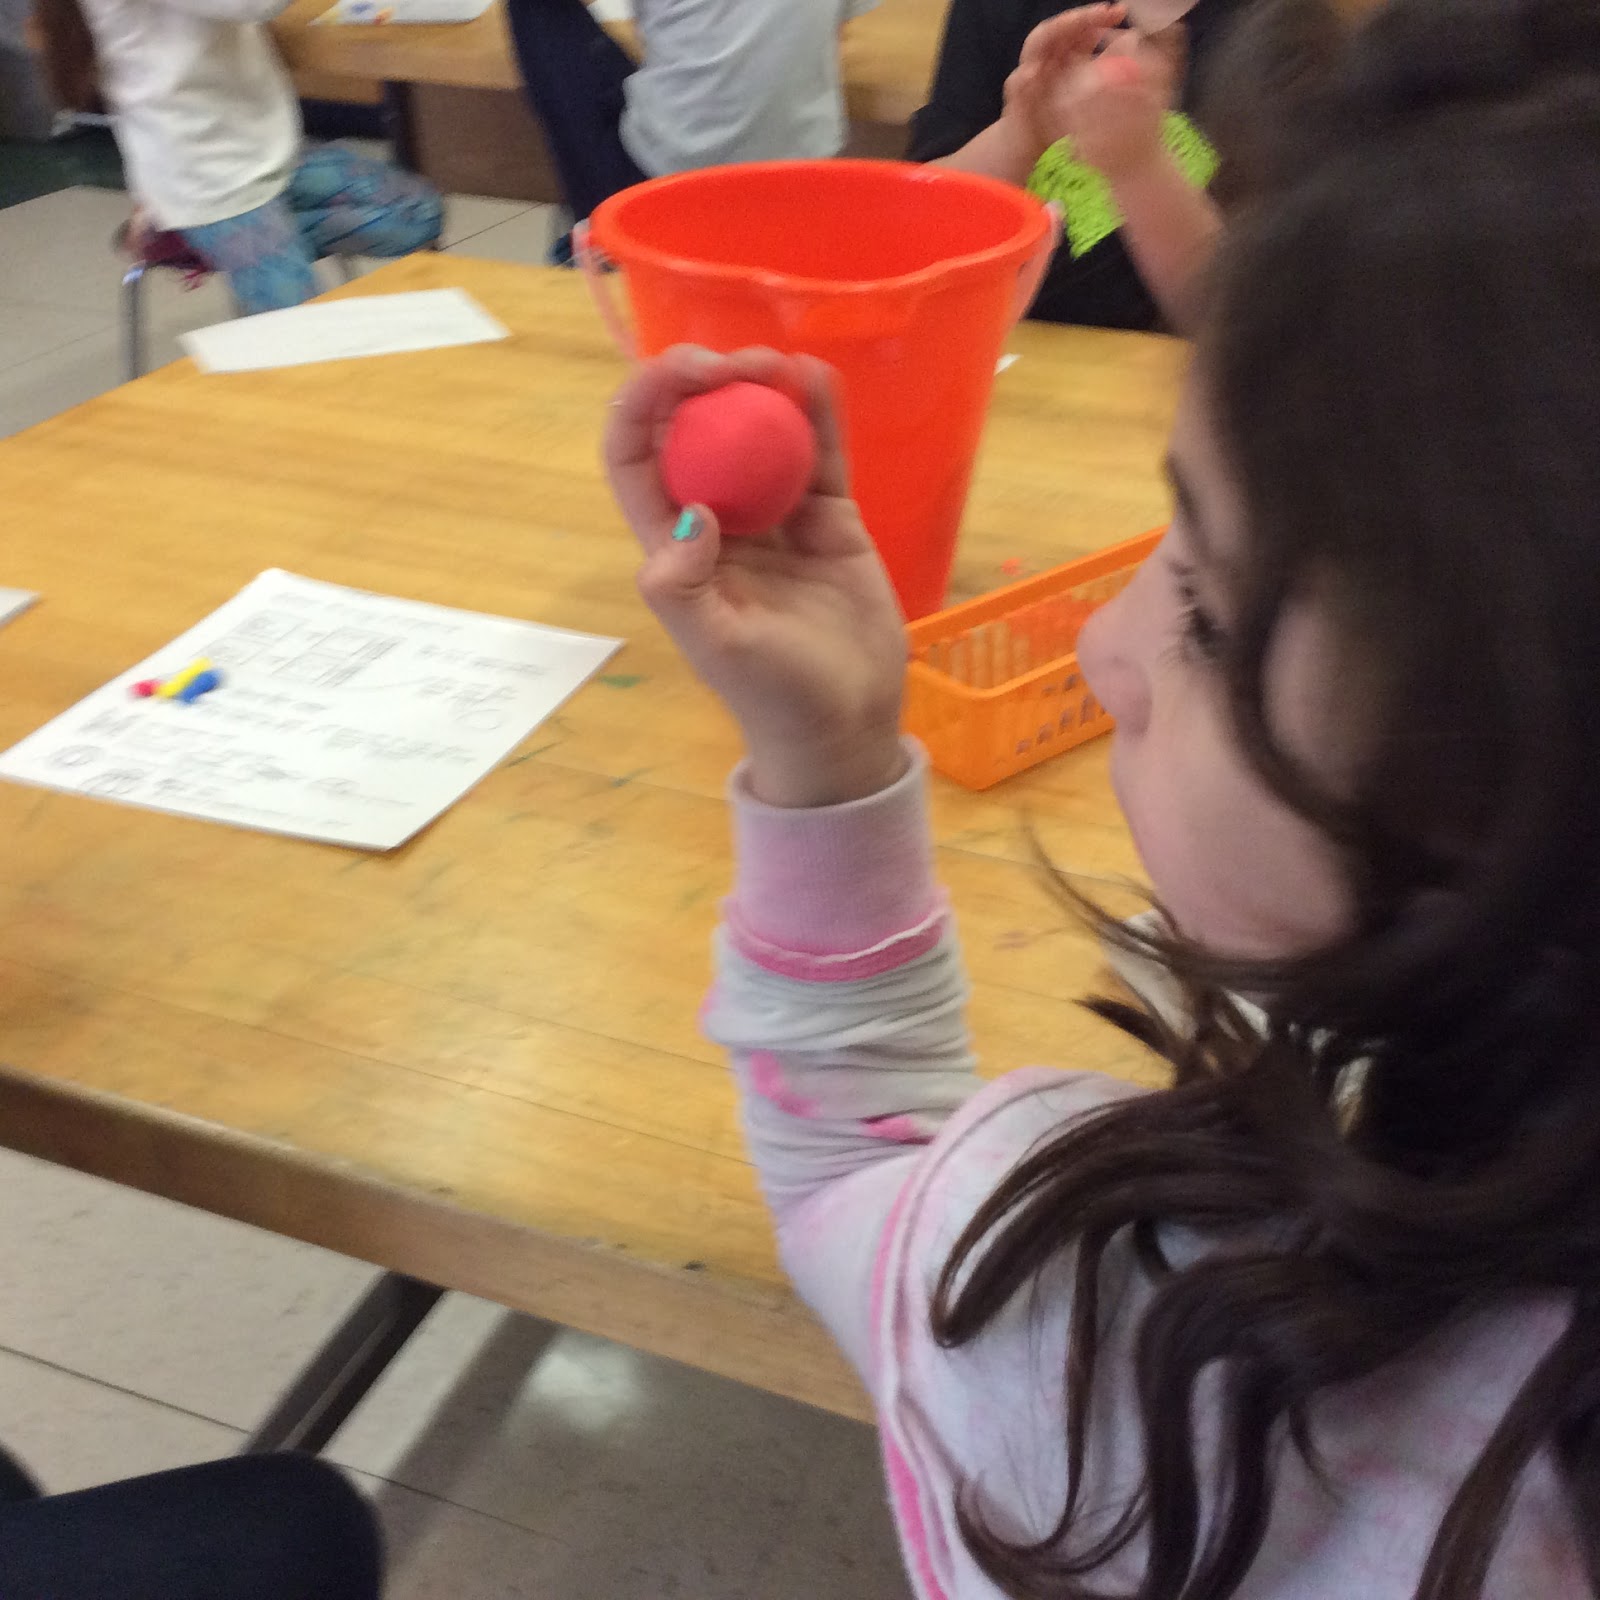
I conducted this project as a directed activity, walking them through each step, one step at a time.
 |
Next the brown for the stem was formed by mixing the very small
pieces of yellow, red, and brown. 1/4" x 1/4" The 3/4" by 1/4"
yellow and blue were mixed to make the leaves.
|
 |
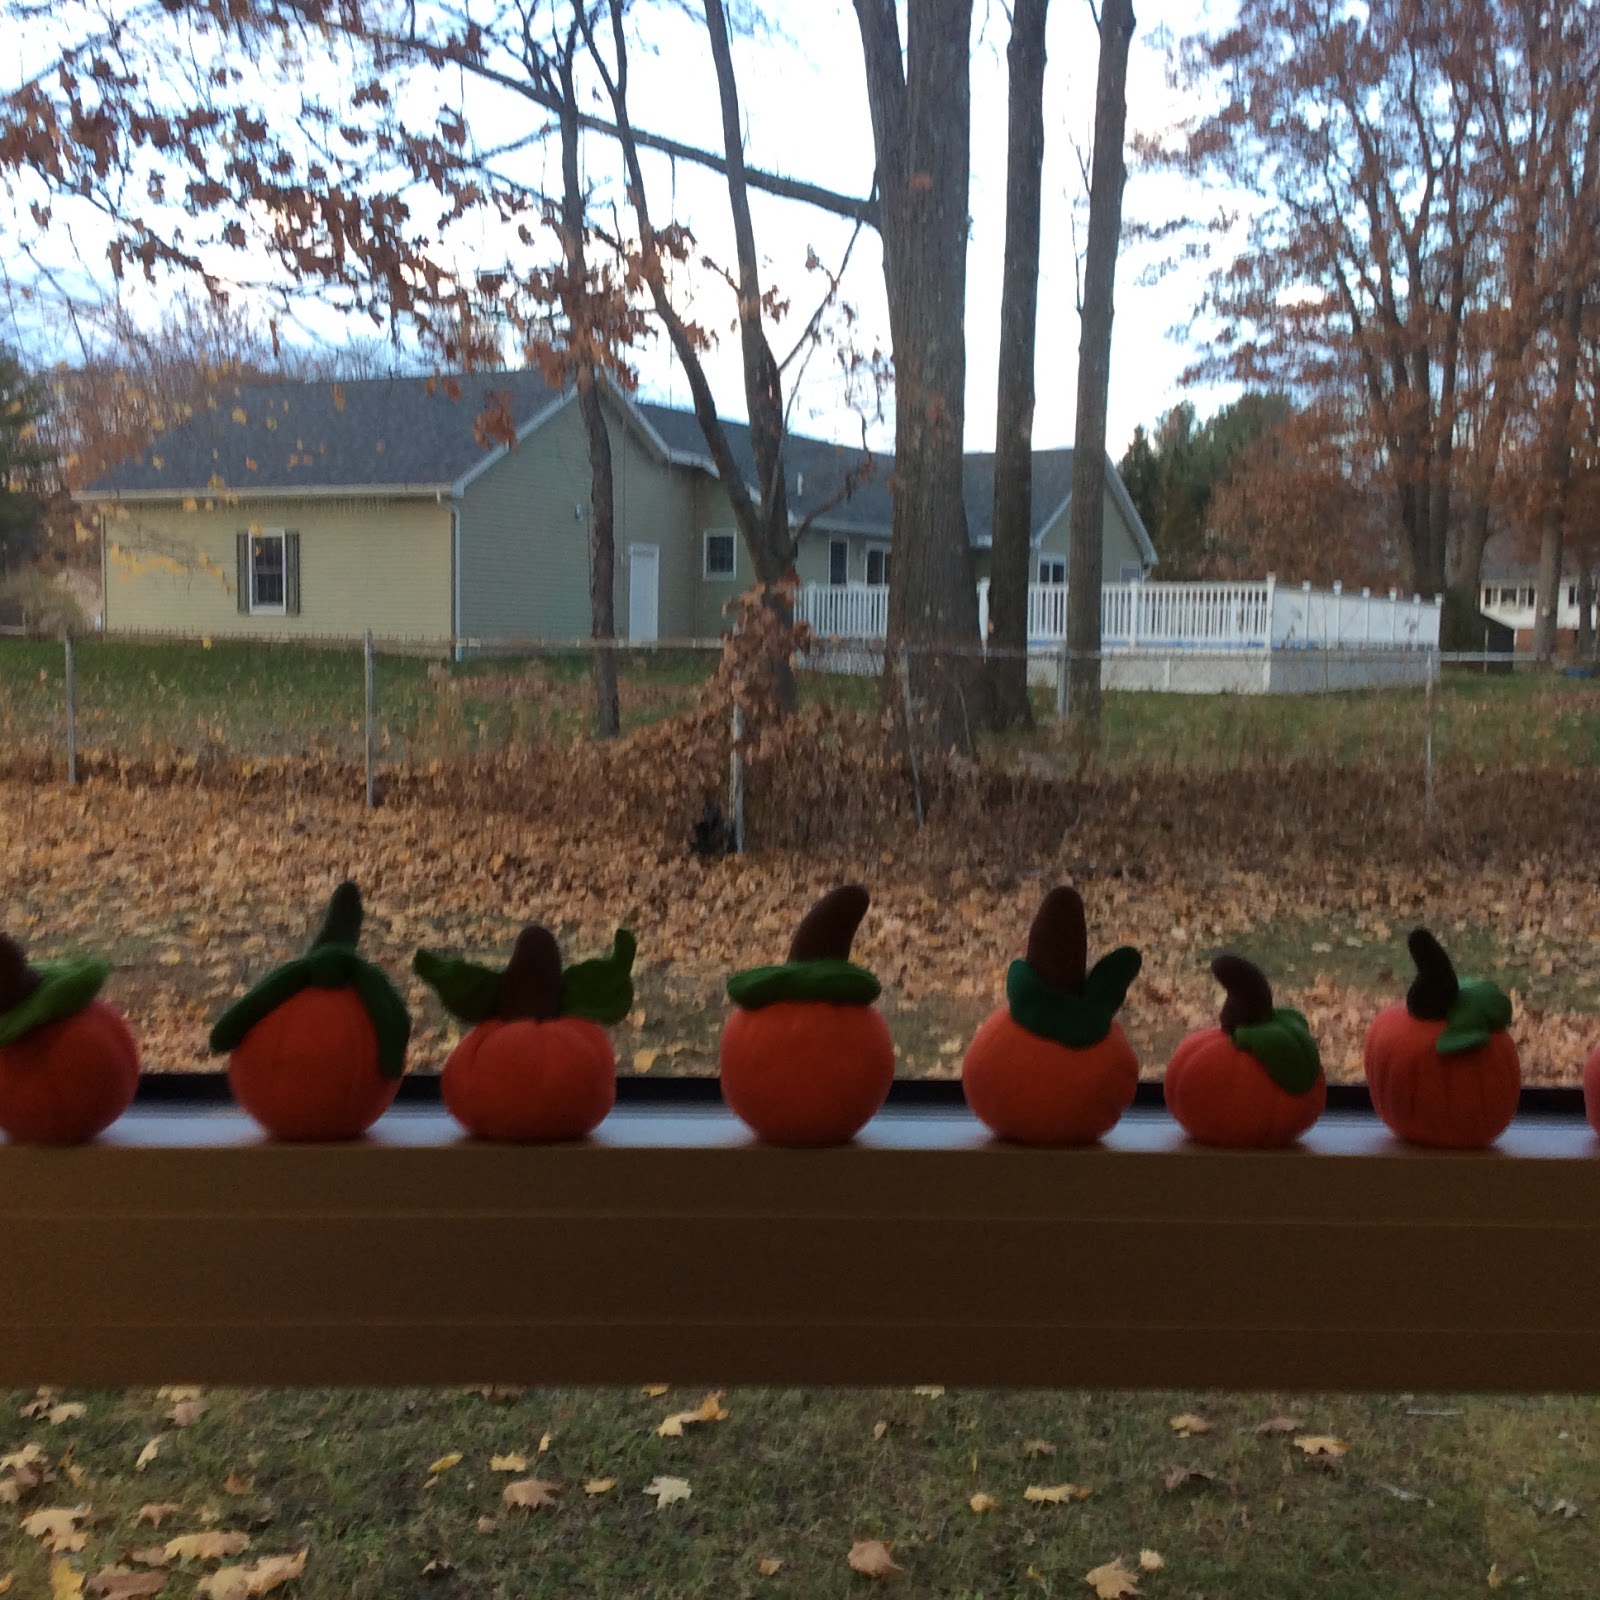
Placed on a tray with student's names until they are dry
enough to write on the bottom with a sharpie |


 I have done this project with my 2nd grade students for a number of years but felt I wasn't making the strong Math connections that I wanted. I was motivated to create a template for the project where students could more closely be involved in the measuring of the clay to make clearer connections. Here is the template I created. I made enough copies so each child would have their own and ran them through the laminator. It can be used like a place mat to actually do the work on.
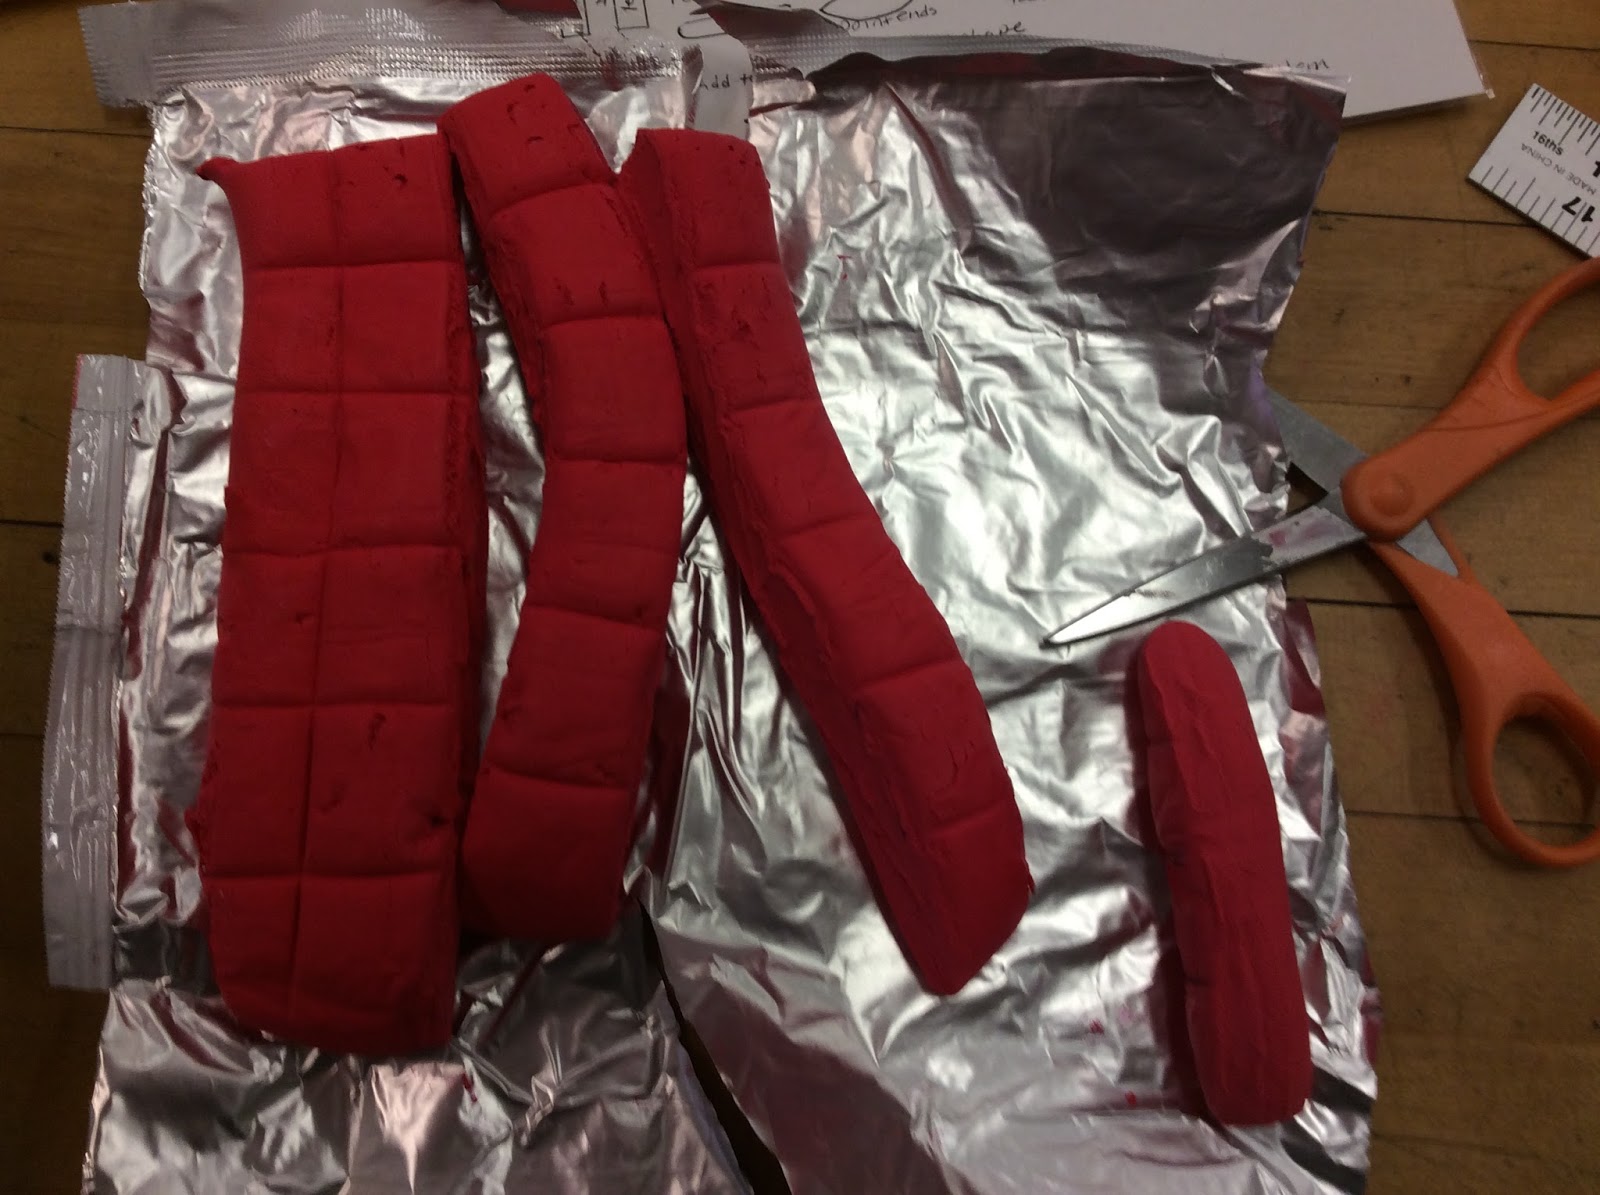


No comments:
Post a Comment