Showing posts with label print. Show all posts

Wednesday, November 25, 2015

Mono printing continued

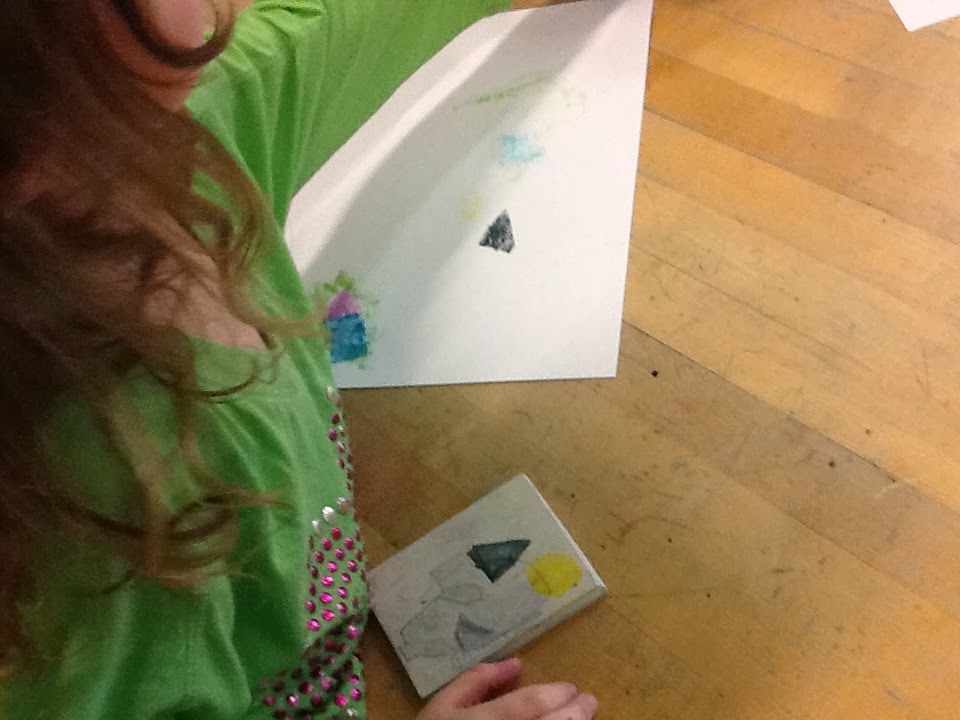
As a follow up to my post on Payon Watercolor Crayon printing here.  I wanted to post a few photos of a group at work.  This was such a successful way to do mono-printing because the students really felt successful.  Not to mention the positive that they were also able to print ghost prints in some instances.  We were using Kutz it and Payons with newsprint.  The only down side is that the Payons do stain the Kutz it but that does not effect future prints.  So here my kids are having a blast!  You could have heard a pin drop except for the delightful exclamations over successful prints!!  This was a terrific activity for the last day before a holiday break.


Monday, December 30, 2013

Screen Printing Snowflakes

This is not my original idea but since I've done it for several years with my students, I have no idea where I originally got it.  I love doing these with my students because the results can be so successful.

Day one we talk about folding and cutting snowflakes.  I generally do this project with 4th graders who I can give a more grown up pair of scissors to.  The scissors intended for younger students are awfully difficult to use for multiple layer cutting that is created with the fold.   I have students fold a rectangle in half and then using the center point of the longest edge as the guide, the paper is folder into 3rd and becomes a cone shape.  The top edges are removed to give the cone three straight edges.  From this point students cut away shapes with the focus on paper falling out of the piece.  This avoids the disappointment when only a slit is cut and the snowflake isn't a snowflake.  Since day one is learning to cut the snowflake.  Many snowflakes are cut.  All go home but one that the student chooses for printing the following class.

Day two and this is the WoW day or maybe they are both WoW days.  At any rate.  I have pre-stretched inexpensive cotton fabric on 10" embroidery hoops.  I like the plastic ones best because cleanup is easier and you don't have to worry about warping.  You will get warping from the wooden ones.  Students write their names on the back of 2-3 pieces of dark blue paper and proceed to the printing area.  Here they place the paper on the table with their name not visible; then the cut snowflake is placed on the paper where they would like to see it printed.  Location, location, location.   White acrylic paint is on the table and either printing brayers or old credit cards.  You might also need a few old brushes.   Lay the hoop centered on the top of the snowflake with the concave area facing upward.  You paint will go inside the hoop on top of the cloth.   Use a brayer or credit card to spread the paint around inside the hoop.  Lift the hoop and you will have a beautifully printed snowflake.    I have students turn the hoop over on the table, convex, while waiting to print a second time to keep from transferring the paint and to keep from damaging their paper snowflake which is now adhered to the cloth by the paint.  You can continue to print until you run out of time by adding more paint and squeezing it through the cloth.   To clean-up I just run the hoops under warm water and scrub from the inside with a kitchen brush.  The snowflakes fall out and head to the trash, clean hoops are dried and put away for the next class.   Before using again, I always tighten the cloth inside the hoop to make sure it is taunt.


Saturday, November 23, 2013

The only other Thanksgiving project I teach

by Cassidy
by Alex
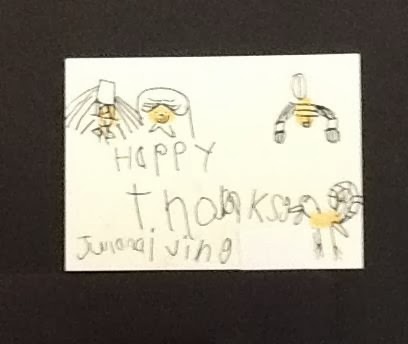
I love this fingerprint book by Ed Emberley.  I've used it on various occasions throughout the year and often pull it out to use the week before Thanksgiving for a quick one day project with my students.  First grade students printed pilgrims, a turkey and a native American this week as a part of the November printing unit.  They have mono-printed with ez cuts, Lego printed and finally fingerprinted for this unit.  I have a copy of the instruction page for each student to follow along and also lead the drawing using my document camera.  Students begin by making fingerprints using skin colored water based markers.  I also give each student a baby wipe to clean their one printing finger when they have completed the fingerprints.  The process reviews the line concepts of horizontal and vertical as prints are made on a piece of card stock.  After the markers are collected, students are given fine point drawing pens to add the details to the fingerprints and create their characters.   Again line is the emphasis here as correct words are given for each stroke.  Example:  draw two diagonal lines for the sides of the hat, add two parallel lines to form the top of the hat and the top of the hat band, etc.  I really view this process with an emphasis on line names and direction of line.  Some students add the words "Happy Thanksgiving" to the bottom of their cards which can be given to family members in honor of the holiday.


by Eva

by Annie
student work


by Julianna
student work


student work

Wednesday, November 13, 2013

Lego robots and machines

Student Work


Student work
 First grade students created a second project from their printing unit today.  Last week they experimented with mono prints and this week they used legos to print robots or machines.I pulled out regular stamp pads for this project but I think I'd rather find some craft stamps for the next time I teach this.  Students began by experimenting with the legos on a small sheet of paper to discover what different shapes would result from the printing.  They were encouraged to experiment with each piece of lego printing the tops, bottoms sides, etc.  After about five minutes of experimental play, a 9 x 12 piece of paper was used to create a printed robot or machine.  Here are some of my favorites from just one of the classes this week.  Interestingly, most of them were completed by the boys. 
Student Work


Monday, November 11, 2013

Mono Printing

Have you ever tried mono-printing with the EZ cuts?  I used them several years ago and decided to drag them back out this year to use with 1st graders.  The focus was on shape and layering the prints to create an abstract product.


 I encourage students to try to create a composition, not only a series of shapes.

 Some students were much more successful than others.  This project always elicits oohs and ahhs as students are surprised by their initial success.  I wasn't quite as pleased with the transfers so for the next class I layered damp paper towel between the pieces of white construction paper to try to keep them a bit more damp.  Since my set up was a few hours prior to the actual class time, the paper was pleasingly damp and not too wet.  Much to my surprise the students began to print on the damp paper towel.  The colors were very vibrant and both the paper towel and construction paper went home as the finished project.

Thursday, October 24, 2013

Hanging on to fall

Almost all the leaves are gone from the trees in our area.  Third grade students hung on to a bit of the fall beauty with leaf prints today.  First several leaves were stenciled onto a page creating a contour of the leaf.  Immediately, more leaves were printed overlapping the first group by using watercolors.  The prints are striking on their own but students suggested we extend the project by turning them into tree compositions next week.  I'll post new photos next week to fill you in on how they turn out.  For now, I really love these!
The vein work is beautiful on this one

Heavier paint made a a more solid print
the viens on this one are beautiful too!


This student chose to only use red for the texture printing


The composition is so interesting and flowing

Wednesday, May 1, 2013

In a spring garden

Cruising around Pinterest a few weeks back, I discovered a cute lesson using a soda bottle to make flowers and decided it would be a perfect lesson for my Kinders with a bit of extension and my own focus.   Here is how I presented this lesson.   First I read the book "In a Spring Garden" edited by Richard Lewis.  It is a compilation of short poems that tell a story about spring.  Next we practiced vertical lines using values of green with markers.  This is the first time Kinders have used markers so a lesson in proper use preceded.  We thought tall, thick spring grass prior to the first mowing.   With white paint, 9 flowers were printed along the top of the grass at various heights.  A pencil eraser dipped in yellow paint was used to add the centers in the flowers.   This was set aside in the dry rack.  Finally,  the traditional symmetrical butterfly was made and added to the dry rack.  I had pre-set both papers with student names prior to class time for efficiency and to avoid "no name" papers.   Students cut out the butterflies and attached them to the flower field during week two.  It is a busy lesson with a lot of transition but I have everything ready to go and switch material out throughout the process.
They turned out really cute.

In a Spring Garden