Wednesday, December 28, 2016

Kindergarten snowmen 2016

A crowd
I do this project every year with my Kinders.  I am sure I have posted it here before but had to add it again because of this picture.  The snowmen are a preface to working with clay after the first of the year.  Students practice forming spheres, cones and snakes using model magic.  The nose is formed by a tooth pick, painted orange, the arms are sticks from a bush in my yard and sharpies are used to add other details.  These are always individual and unique.  Sometimes they even appear melted and ill-shaped; just like real snowmen would.  I try to display them in the case at the front office for the weeks prior to Holiday break.  This is what they looked like when I gather them up to redistribute to the kids to take home.


Student works - they are color coded by class

Student work
Student work

Tuesday, December 27, 2016

A Winter Wonderland


The focus of this lesson was to demonstrate an understanding of the illusion of space in an art composition.   First grade students enjoyed creating the crayon/watercolor resist and salt technique to create the background.  I have done a similar project with my students for years.  However, we added a new twist to the project in the way we created the trees this year.   Students first colored a coffee filter using markers in an analogous color family.  The filters were spritzed with water and laid aside to dry.  Once everything was dry and the extra salt had been wiped away from the watercolor background, the coffee filter was cut into a variety of sizes of triangles.  These would become the trees in the winter wonderland.  Students review the important methods for visually creating the illusion of space and attempted to include as many as possible in their composition.  These examples demonstrate size, placement, linear perspective and overlap.  Final touches were added to the trees using a drawing marker.

Make a trade

Hall bulletin board to explain to experience to those not involved at school
Thanks again to Nicole Hahn over at Mini Matisse for organizing this year's ATC trade.  What a terrific experience for my students.  I really enjoyed seeing all the varied cards and once the students understood they were theirs to keep; they were pretty psyched as well.  Here are a few photos from our experience.


A little close-up view

I posted this bulletin board in the hallway with photo copies of some of the cards we received.  The card wraps were posted with links to the states they came from.  This way non-participants were exposed to the experience and were able to read about the schools we received cards from.

Let me see your card, too!

Want to trade?

This was great...I love the art I received!


We loved trading.  The only dissappointment was the missing artist information on the back of some of the cards.  We were able to think like detectives in some instances to solve a few of the mysteries but wish that everyone had taken the time to add the information to each card.


Here is the worksheet we used to evaluate the cards.  In the center, students attempted to recreate their card.  The lower right circle was to contain three things students liked about the card or the experience of participating in the trade.

Most of all we can't wait to join in the trade again next year.  Thanks again Nicol Hahn!


Wednesday, December 14, 2016

Kindergarten Arctic Animals - The many varieties of creativity


This was a Kindergarten directed draw with a focus on how shapes combine to make forms and identifiable objects as well as patterning with shapes and colors.

Monday, December 12, 2016

Arctic Animals - Connections with the Curriculum

student work
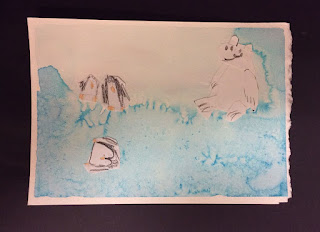
As a part of our PLC groups, I was task to connect with Science standards in Kindergarten and 1st grade.  I have searched everywhere trying to locate the source of my inspiration for this project so apologize to the person who posted it first for not referencing you here.  Students cut out shapes to form the polar bear to connect how geometric shapes are combined to create organic shapes.  Shapes and lines were used to add the small penguin friends.  The back ground was created with watercolor and a little Kosher salt.


student work

student work
Directed draw for penguins

Shapes for bear

Saturday, December 10, 2016

You can't help but love a kid

Student work
Let me start by saying,  most days I really love my job because I love the kids.  I love the amusing things they come out with that send me chuckling in my head.    Most of the time it would not be appropriate for me to laugh out loud although I'd really enjoy a huge belly chuckle!  Occasionally, I let those huge belly laughs escape and expose that amused side of myself despite my best intentions.

So here is my latest why I love my students.  Yesterday was a half day for students and my classes were 5, 4, and 3.  I really enjoy working with the upper grades.  Let's face it, they are so much more capable, less needy and less whinny; for the most part.  One of my classes had a huge number of students absent due to just being out and also instrument classes.  What I had planned for them was going to be severely impacted by all those absences.  I decided to reward them for their attendance with a free art day.  Free art always means I will get a long list of drawing request.  I'm not sure why they like for me to draw for them, but they definitely do and this is the reason for this post and why I really love my kids.  I'm drawing something that a student has pulled up on the iPad, a pit bull, I think it was.  Over my left shoulder I hear.  "Why isn't Mrs. Hyman's work in a museum? She's a real artist."   "Yeah, I know, they hang things like lines and dots in a museum and her drawing looks like something", from another.  "Mrs. Hyman, is the story of 'The Dot' based on a true story or is it fiction?" from a student sitting next to me.

Yeah, I love my students.  You can't have conversations like this anywhere else!

Saturday, December 3, 2016

It's Happened!!!

The amazing Nic Hahn has completed the sorting of the 2016 ATC trade.  Our cards are in the mail and on their way.  My students are eager and I must admit, so am I!!!  I can't wait to see that little package arrive and be able to share the trade with my students.  Nic posted a few photos on her blog, here.  I was able to locate photos of our two schools and the receipt of our cards.  Funny, but I've honestly worried for weeks that they might not arrive.  Here are our cards: I'll be sure to update when our packages arrive and how we continue managing the trade in our schools.

Monday, November 14, 2016

Building a Still Life Composition.

After taking an AOE Studio Drawing course this past summer, I have rethought my process for observational drawings.  This year I have decided to truly involve students in the still life process by allowing them to touch the items and put together the components of their own still life rather than being limited to what I might assemble for them.  The focus for the assignment is to demonstrate an understanding of Space in art by using overlap, placement, and linear perspective.  Students in 4th grade are drawing Pez dispensers.  Part of the fun is truly examining the dispensers and choosing which ones are most personally appealing. Here are some photos of the process as students are spending week two on building their still life compositions.


3D Color Mixing Pumpkins


Color Mixing Pumpkins


I have done this project with my 2nd grade students for a number of years but felt I wasn't making the strong Math connections that I wanted.  I was motivated to create a template for the project where students could more closely be involved in the measuring of the clay  to make clearer connections.  Here is the template I created.   I made enough copies so each child would have their own and ran them through the laminator.  It can be used like a place mat to actually do the work on.

First I measured out the red, yellow and blue model magic clay for each student.
I use scissors to cut the individual pieces.
Measure off pieces and mark in the clay
Use a ruler to connect the marks
I used the side of the ruler to connect the dots and mark the cutting lines


Blue pieces are much smaller

I began by handing out the three colors of clay that were needed:

The place mat ready to begin

First step, mix red and yellow 1" pieces together.  Add in an extra piece
of red that measured 3/4" x 1/4".  This gave a red-orange
color for the pumpkin.
I conducted this project as a directed activity, walking them through each step, one step at a time.


Next the brown for the stem was formed by mixing the very small
pieces of yellow, red, and brown. 1/4" x 1/4"  The 3/4" by 1/4"
yellow and blue were mixed to make the leaves.


Placed on a tray with student's names until they are dry
enough to write on the bottom with a sharpie


Saturday, October 22, 2016

Working on ATC in 4th grade

4th grade ATC
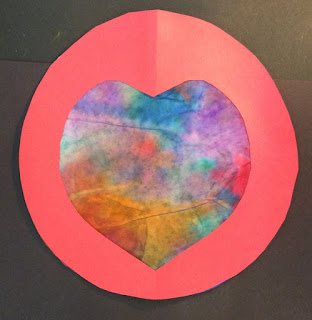
Students in both of my buildings are participating in the ATC exchange with  Mini Matisse over on blogspot.  I decided to structure the cards around particular lessons so that students would be exposed to artist or concepts by grade level and then able to prepare their card with some specific parameters.  Fourth graders investigated the artistic style of Laurel Burch, folk artist, who was propular within the last 40 years or so for her whimsical jewelry designs and other commercial items.  Students were drawn to the colors and patterns and jumped right in to develope their own individual ideas for their subject matter.  Burch is most well known for her cats but has also included other animals in her work.  Students choose cats, horses, dogs, unicorns from stencils I had prepared ahead of time.  A few creative individuals dabbled with their own personal ideas.  The backgrounds were created using coffee filters.  Students drew a variety of geometric shapes.  These were squirted with water.  Students watched in amazement as they discovered the shapes were morphing into organic shapes.  Finally, a way to truly demonstrate the differences in geometric and organic shapes.  The results were breathtakingly beautiful.  We have stashed away the left over scraps for future projects, these were too beautful to throw away!
White Fang by Analeah

Dragon by Hope

Tuesday, October 18, 2016

Build and Draw - Observational drawing with Kindergarten

Build & Draw
I took my first Studio class with AOE this past summer, Studio Drawing.  If nothing else, the course gave me the "courage" to try a few new techniques with my students.  I also re-evaluated some of the ways I presented a few of my lessons for Kindergarten.  After taking the Reggio Emilo class a year ago, I have been beginning the year with my Kinders doing creative play activities using a variety of manipulative and not jumping into the year with projects.  After four weeks of creative play, I introduced my students to a draw and build.  They used three children's blocks to build something and then drew the shapes using a whiteboard.  For an entire class, they built, drew, rebuilt, drew, etc.  This week, five weeks into the year, I handed them pencil and paper for the first time.  They repeated the build and draw on one piece of paper, three times, then were given colors to practice their coloring skills.  This was a terrific way for me to establish a baseline for observational skills, shape identification and reproduction and coloring.  I am so happy with the results!
Kinders are standing to do art this year


Progressing with their drawing

Ready to build again

Focus

Great Concentration

Building

Let's get started!

Trading blocks to build again.

Lots of building imagination
Starting to add color