Showing posts with label metal tooling. Show all posts

Saturday, June 2, 2018

Metal Tooling - two different ways to managed the medium

3rd grade Worked, textured and inked
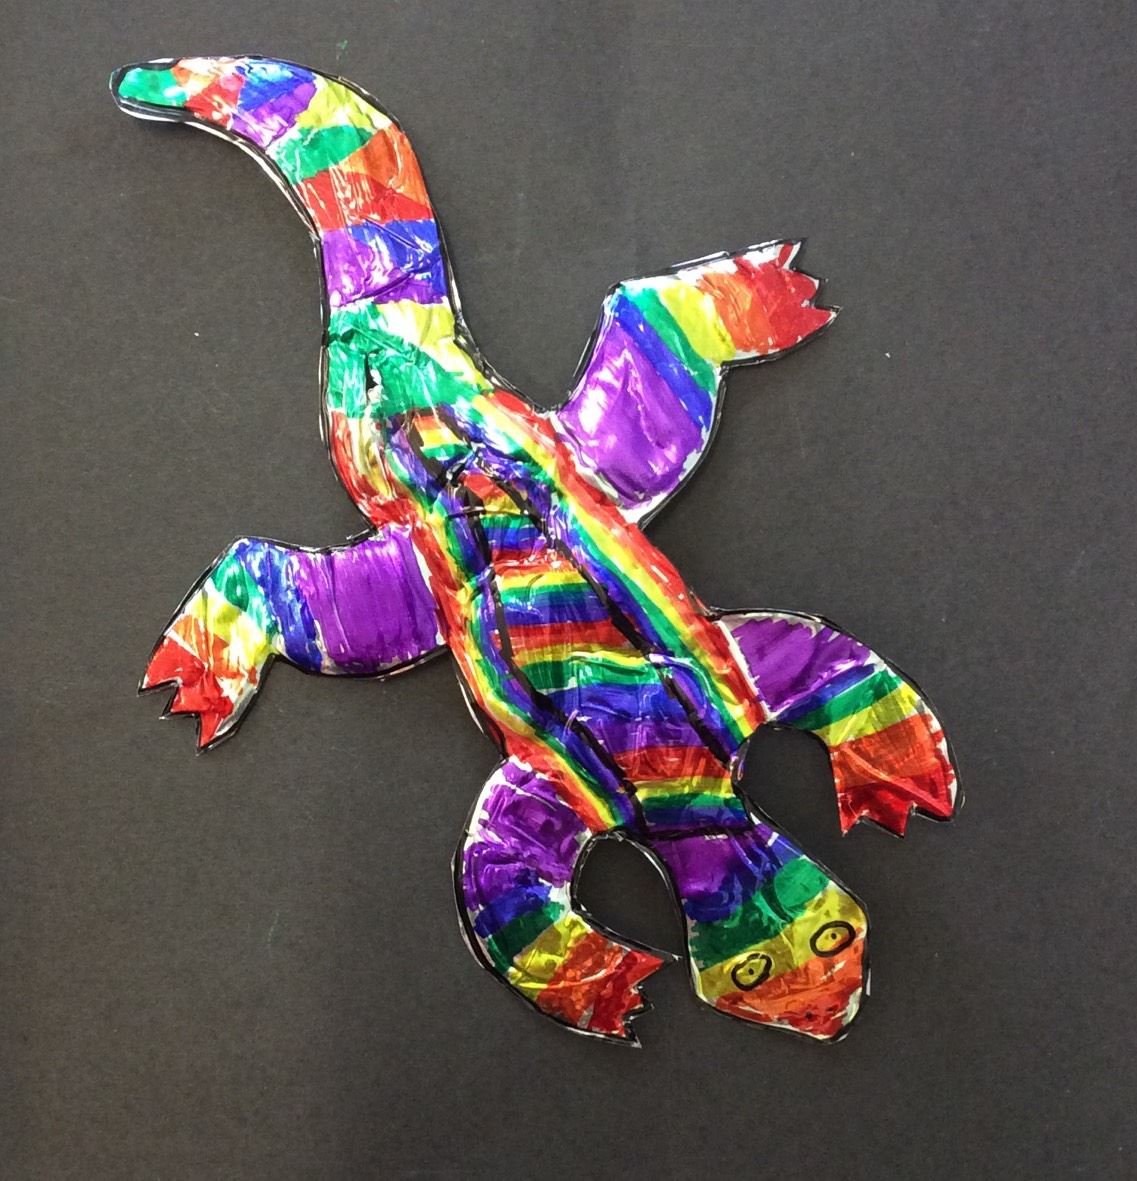
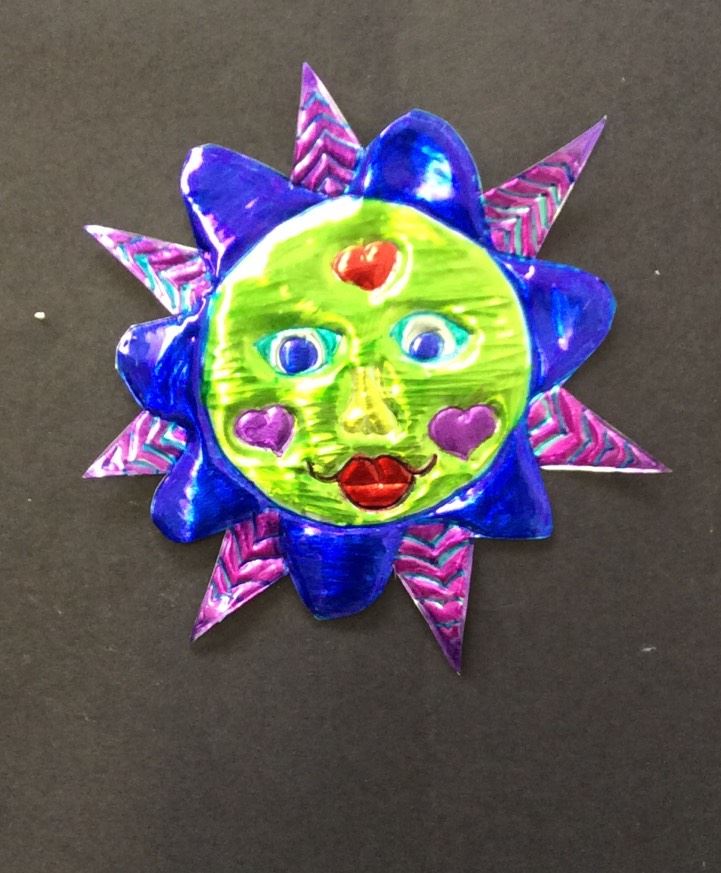
If you don't follow There' a Dragon in my Art Room you really need to.  Phyl is a retired Art teacher from upstate New York.  Lots of experience shows in every one of her post and even an old timer like me can learn from her.  I saw her recent post on Metal tooling and knew I had something to learn.  Now I have done tooling with my elementary students for years but Phyl's ideas encouraged me to take my lesson in a new way.  Here are some images of my student's work this year and I've also added some from the way I have utilized the material in the past.  Both ways work well and I encourage you to investigate both if you haven't already added this medium to your art room.

3rd grade: Worked, textured and inked

3rd Grade: Worked, textured and inked

3rd grade: worked , textured and inked
4th grade: worked and colored with Sharpies
4th grade: Metal worked and colored with Sharpies
4th grade: worked and colored with Sharpies


Wednesday, July 17, 2013

One more day creating with Metal Foil Tape

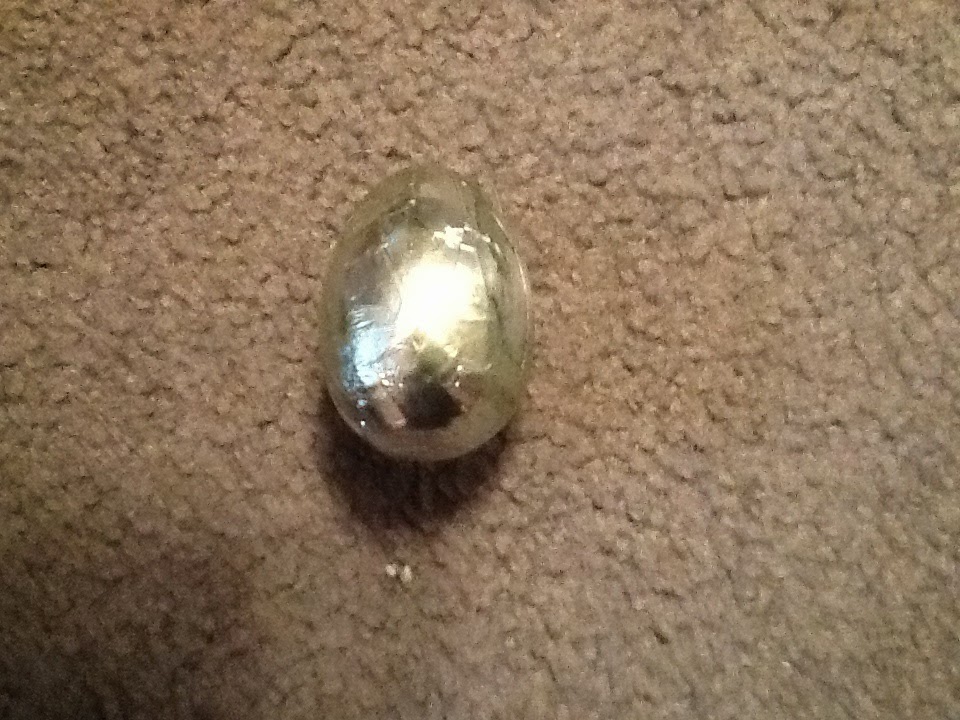
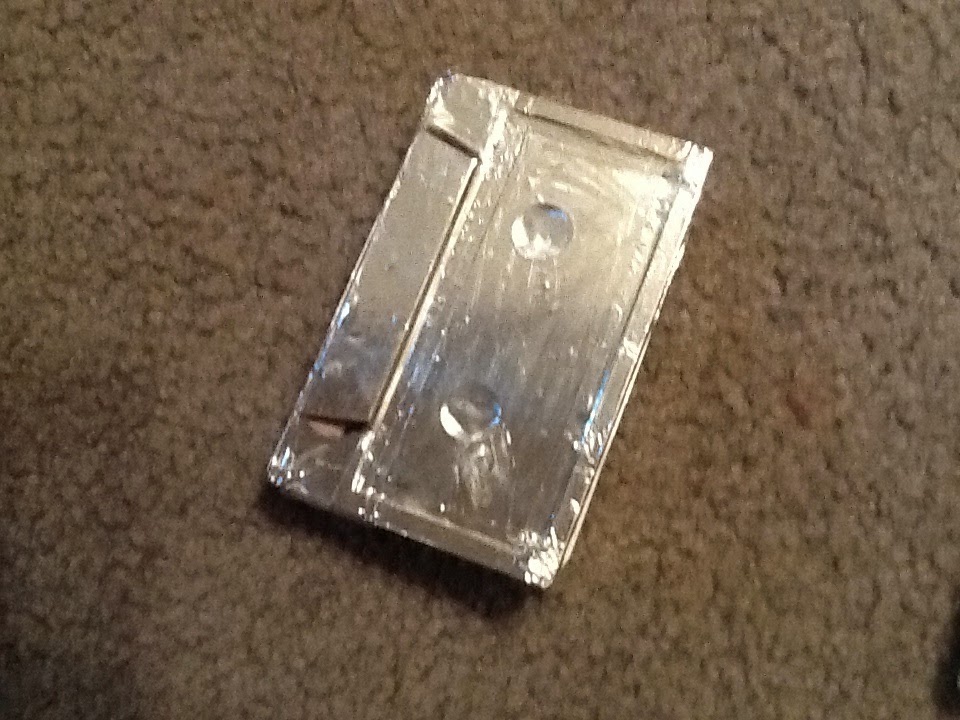
Cassette Book, egg and another drawing book


 Another day of playing with the foil tape.  I truly am addicted to all the possibilities!  I don't think I am finished with the egg, yet.  I envision a little patina on it and maybe a few embellishments like charms or chains.


This cassette tape book was the most fun.   I removed all the screws and disassembled the tape case.  I saved everything but the tape because you just never know what  you might be able to do with those things!  : )  A cardboard spine was added to make it work as a book and I also added cardboard to the hollow areas to smooth out the look a little.  The pages were found free on the Internet by Googling music sheets.  They add a little whimsy to the idea of a cassette tape book.

This final piece is another drawing book similar to the one from yesterday.  The textural elements were created from paper cuts.  I applied them to the back of the tape prior to attaching the tape to the book.   I really like how interesting the book looks and think that it adds a bit of mystery to the look.  This will be my final pieces for a while.   I have to take a face painting break tomorrow to paint at a city summer program.  It's a repeat and always a lot of fun.  The kids are terrific.  Tomorrow night I will be beginning a class on children's book writing.  I integrate children's books into many
of my lessons.  I have lots of ideas of books I would like to read related to what I teach but can't always find a book to fill my expectations.
I've entertained writing my own on numerous occasions.  So, this is me taking a giant leap into seeing if this will work for me!  Wish me luck!

Tuesday, July 16, 2013

Metal Foil Tape

As I mentioned in my last post, I am really addicted to this Metal Foil Tape that I found at the hardware store.  I finished covering the globe yesterday, added some fake rivet marks and used inks on it to distress the finish a little before I sanded and scuffed the finish.  I'm not sure where I am taking this piece next.  I have a few thoughts and plans rattling around in my brain.
.
The photo is not the greatest because the light from my camera bounces off of the metal finish.  You can sort of get an idea of what it looks like.  I couldn't sit still while I muddled over what to do next with this so I set it aside to conquer more objects with the tape.   I had taken apart some books for a previous project with some 4th grade students in the spring and ever the pack rat, kept the covers.  After selecting one from the pile in the basement, I took out the tape and got to work.  I taped and inked the cover before adding a string to the book to tie it closed and the inside pages made from drawing paper (9 x 12) folded in half.  I wanted to embellish the outside a bit so added some features I had purchased at the craft store in the upper right corner and a tag and lady bug created using a sizzix dye and more foil tape. Here are those photos.


My last project for the day, I was starving and had worked right through lunch, was a small Whitman's candy tin I found in the basement from many Valentine's ago.  I covered the top and then embossed the metal with overlapping shapes.  This was a very similar project to the coins I have done with 3rd grade classes.  I used sharpies to color in portions of the shapes and added texture to other areas.  I discovered that a fine line sharpie could be used for color and texture at the same time.  I don't think I'm through with my search for things to add Tin Foil Tape to.  I'll keep you posted as I keep creating!

Monday, July 15, 2013

What I've been keeping busy with.....

the process
This mess is the product of some creative jewelry making that Kaileigh and I got into this past week.   One of my good friends was celebrating a birthday and I wanted something original to give her as a gift.  I had been surfing a few blogs and discovered a tape transfer process at the blog Balzer Designs.  Click on Holiday Handmade for her video tutorial. It is really an amazing process using colored photocopies and packaging tape to create a clear transfer of the photo.  We then mounted them on a plastic shape called a fragment, finished the edges with foil tape and added jewelry fittings to create earrings and necklaces.   Kaileigh has gotten so into the process that she is still creating with hopes of selling her pieces at a craft fair this weekend.   Here are a few more photos.
Some of our creations
Some work from Kaileigh's original photos
The big one is fireworks from the 4th!


This was the finished gift for my friend
I really loved working with the foil tape.  We cut it into thin strips for use on the jewelry fragments.  We found it at the hardware store and it comes on a roll that is about 2" wide.  I'm trying to discover other ways to use it.  It can be embossed like the Art Foil we used at school and colored with permanent inks and sharpies.  I'm in the process of covering a globe with it.  I'll post a photo when it is finished.

Sunday, June 30, 2013

State Coin Project

Way back in February I posted a lesson with 3rd grade students where they create a coin based on a personal representation using metal tooling foil.  I have never posted some of the finished projects.  Here are a few of the student works.


Friday, May 31, 2013

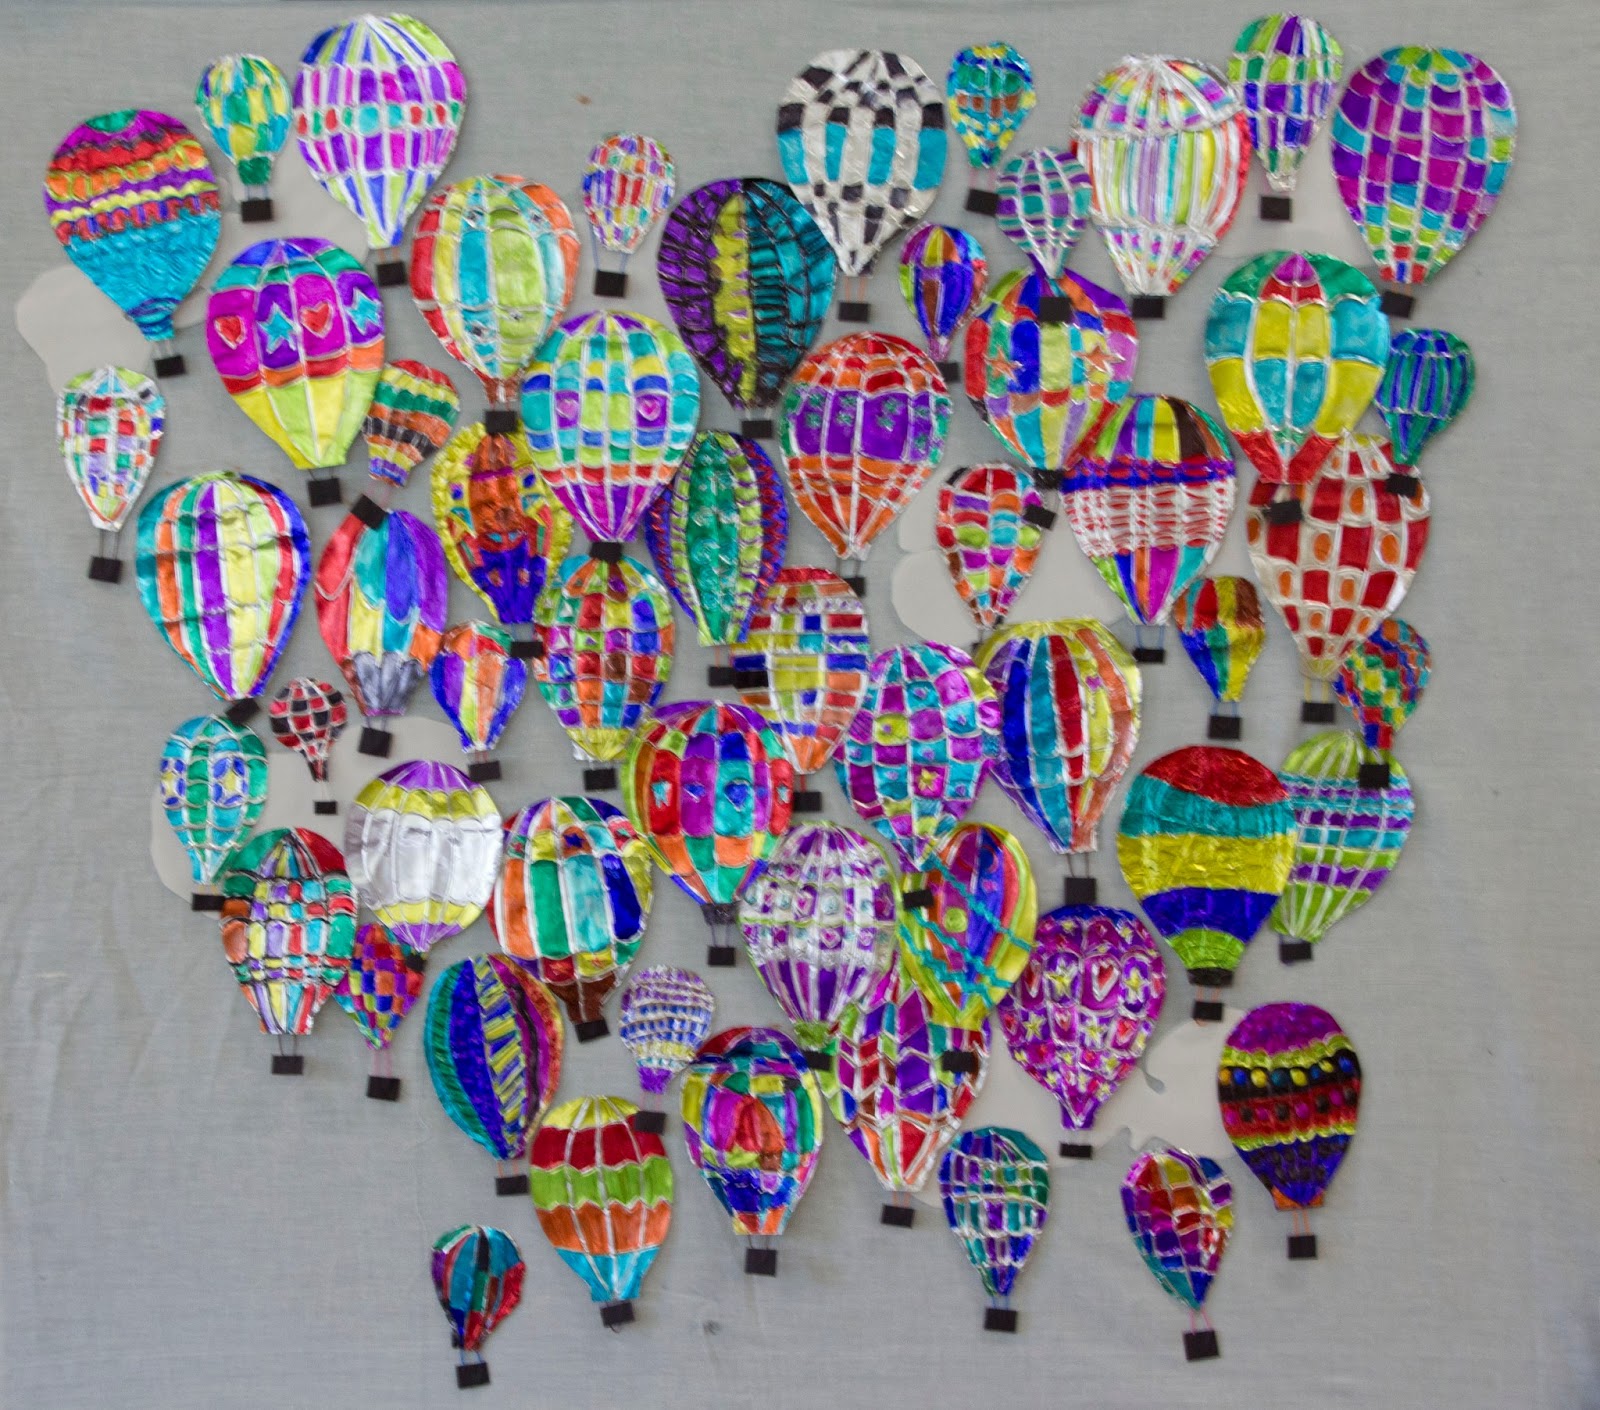
Saige's hot air balloon project

     I've been beside myself all month wanting to post this blog but I have tried to be patient.  I'm so excited to finally share this with everyone.


     Recently our PTA president contacted me about a grant she had found on the American Girl Website.  The subject had to be hot air balloons.  I had recently pinned a work by David Kracov and knew instantly that this would be the inspiration for the project.  I began by researching the artist and learned that Kracov is a native of Boston and a graduate of the Rhode Island School of Design.  This was terrific,  my students really engage when they find out about a current, living artist and this one was from our home state.  Kracov is an animator and a sculpture.  The work I had chosen as an inspiration is one of his metal works.
      Picking up the books about Saige helped me to gather a little American Girl history for the project.  The students, boys and girls really got caught up in the story of how Saige, a young girl from New Mexico, was upset when there was no Art program in her school and began a movement to start an after school art program.  This character could represent so many of my students and the disappointment they would feel at the loss of our art program.  Most of my students were alarmed to learn that some students really do not have an in school art program.  I think they appreciated me even more than normal!
      So the project:  I limited the participation to 3rd, 4th and 5th grade students.  Working with Art Foil, each student cut out the shape for the envelope of the hot air balloon.  Working together we analyzed the direction lines should be placed on the balloon to create a perspective and roundness for the balloons.  Students then detailed the balloon in a personal way and used sharpies to add color.  Magnet tape was added to the back of each balloon after twistee wire and construction paper were used to add a basket.  From here, this became an interactive collaborative project.  Students placed their balloon on a bulletin board that had been covered with a blue cotton background and white paper clouds.  After a photo was taken, all students of all grades had the freedom to rearrange the balloons in a new configuration.  Three digital images were taken for the grant application.  The balloons continually changed the entire time the bulletin board was up.
     The balloons were colorful, beautiful, original, and individual.  This was an exciting project.  If we hadn't run out of Art foil since it's so late in the school year, I'm sure everyone would have wanted to make their own balloon!

Tuesday, February 19, 2013

State Coin Project


As part of the state curriculum,  students in third grade study our home state.   As a supplement to their work, I developed the state coin project.  This could be adapted to any state.   I encourage students to learn about the coins specially minted for our state and share with them a background of how the coin was developed.  Each student is then challenged to create their own coin to represent themselves.


.
 LESSON PLAN: State Coin Project
    ART:  Grade 3


Objective:
            Discover that a state coin is a piece of art and create a meaningful coin using
            symbolism to represent ourselves.
Educational Theory:
            Creative thought, self expression and self discovery in relation to a state symbol

What You Need:
           
Newsprint, drawing pencil, visuals of several state coins with supplementary information from website: www.usmint.gov/KIDS , round lid to use as tracer for coin size (top of cream cheese container), copper or silver art foil and embossing sticks, scissors, black tempera paint, black construction paper, glue, sharpies, old mouse pads (1 per student, donated by a local computer company)

Time: 2 – 3 class periods of  45 minutes each
           
What You Do: 

 Wk 1:  Using document camera, display a few state coins.  Have students
            speculate as to the meanings of the different symbols on the coin as a group.         
            Students should have a baseline of information as they are usually studying their
            state or origin in 3rd grade.  After discussion where everyone should be permitted
            an opportunity to give ideas and input, actually share the history of the coin, its
            origins and symbols along with supplementary information about the minting
            of coins. 
            Discuss significance of symbols and why symbols might be personally important
            to individual students.  Students ‘brainstorm’ on paper with thumbnail sketches
            of things they would like to include on a personal coin.  (ideas might be favorite
            activities, sport, animal, etc.)
       
Students are given 9x12 newsprint which they will fold in half and then half
 again.  On each of the 4 sections, they will trace the circle that will define the
shape of their coin.  Incorporate thumbnail sketches into 4 different coin ideas.
Encourage students to experiment freely and to not get bogged down with
perfection at this point in the project.  They should only be focused on symbolism
and ideas for their coin.  Additional paper may be used if necessary.  Final
choice should be clean and precise with moderate detail and fine line.

Wk 2:  Finish drawing from 1st week if needed.  After selection final coin design, teacher
            will assist with applying masking tape to position paper onto art foil for transfer.
            The foil should be precut to slightly larger than coil drawing.  Working on an old mouse pad
            to soften the surface of the table, students transfer their drawing to the
            foil by drawing over their lines with a pencil.  Slight pressure is used for the
            transfer.  Once all lines are visible on the foil, the paper can be removed but
            should be saved for reference.  Using embossing stick, trace over all the lines
           on the coin, applying pressure but not hard enough to cause hand discomfort.  Turn
           coin to back side, using the blunt end of the stick, raise all the areas outside of the
           lines, again pressure that does not cause hand or finger discomfort.  Continue this
           process until coin has achieve desire texture making certain to not lose the
           integrity of the design.  The surface should have a 3D effect of 1/8 – ¼ inch when
           completed.  If time, cut around the circle of the coin to define shape.

Wk 3: Using black tempera paint, cover the coin and then when dry, lightly rub paint
           away from all raised surfaces.  Use sharpies to add color as desired to the design. 
           Glue coin in center of black paper and mat with white to complete for display.  
           On separate sheet of paper, students will write about their coin and explain the 
           symbolism and why they chose what they did.
            Both pieces should be displayed together.

Teacher should be observing and supporting the process throughout the three class periods, encouraging students to be created with thought and medium and monitoring understanding of the process.

Evaluation:  
Cleanliness of finished project
Consideration given to symbolism
Originality of work exhibiting personal creative endeavor